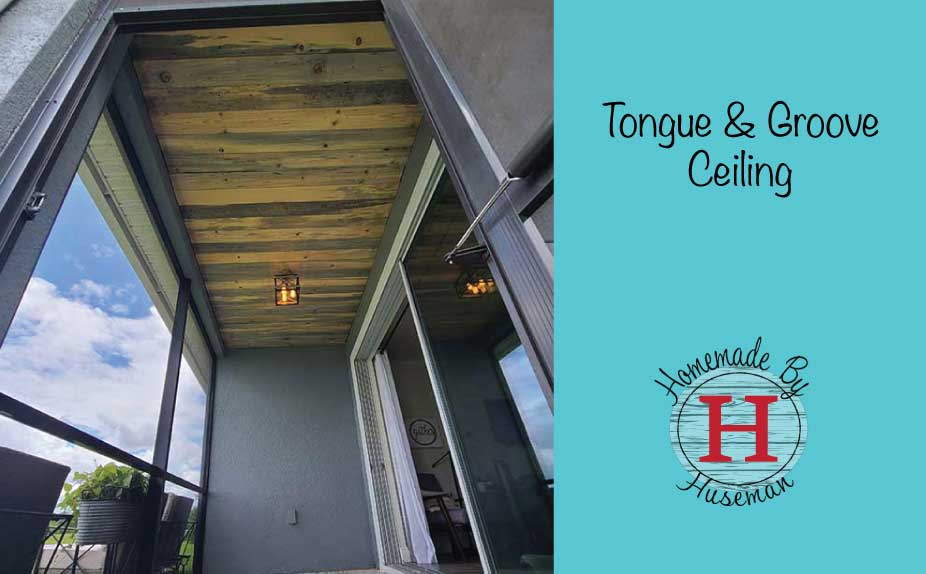
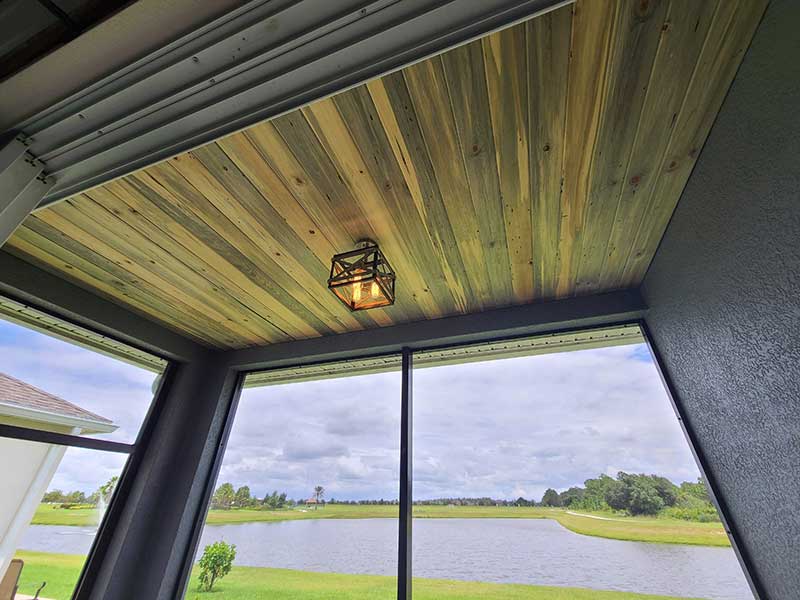
A tongue and groove porch ceiling can instantly change the look of your outdoor space. Our friends found this amazing pine with a natural blue stain and it looked absolutely stunning. With a few of our tips and tricks, this DIY project will have you looking like a pro in no time and you’ll be ready to invite friends over for a backyard bar-be-que to show off your tongue and groove patio ceiling.
Project Details:
DIY Skill Level: Intermediate
Time Frame: This project was 85 square feet and was finished in about 3.5 hours
Tongue and Goove Ceiling Cost: This project was 85 square feet and costed about $225.00 for all material
Materials Required:
- 1×3″ Furring Strips (optional)
- Tongue and Groove (T&G) boards (Pre-Finished or raw Pine)
- Screws, #9×2.5’’ GRK fasteners (optional)
- 18 ga. Finish Nails
- Electrical box extender (if needed)
- PL 375 Construction Adhesive
Tools Required:
- Nail Gun with Air Compressor (Or a hammer, but it will take much longer)
- 18 ga. Finish Nail Gun
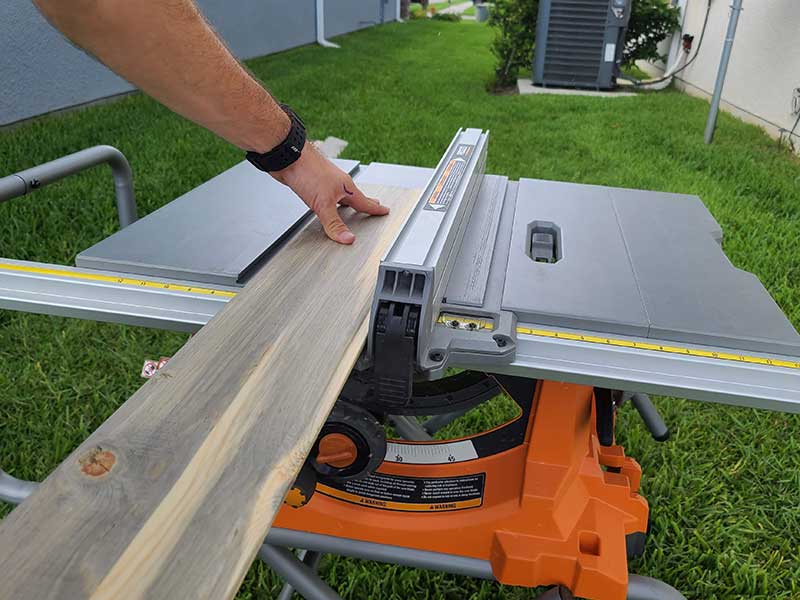
- Table Saw or Circular Saw
- Jig Saw or Hand Saw (if cutting around outlets)
- Miter Saw or Hand Saw
- Mallet
- Stud Finder – make sure you have a battery!
- Pen or Marker
- Tape Measure
- Calculator (optional if you’re a math wiz)
- Caulk Gun
Finding Trusses Instead of using a Stud Finder
On this project, Steven tried to use his Stud Finder, but did not have a spare 9 volt battery and our even our smoke detectors (to our surprise) use AA Batteries… So we got creative!
With Steven’s wealth of construction knowledge and the help of the home’s truss layout plans we were able to locate the trusses by measuring the ceiling and using a screw to verify a truss was in that location.
If you want a copy of your floor plans, many municipalities keep copies of file that you can request.
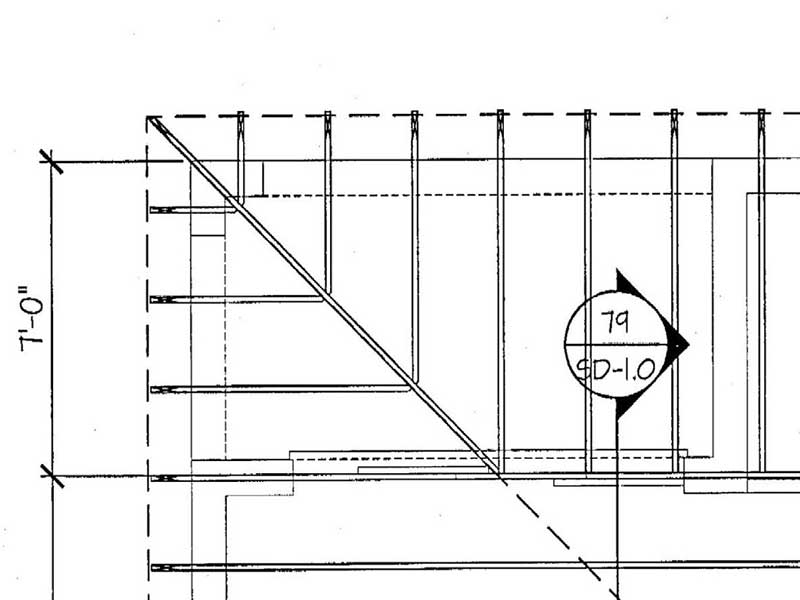
- Start with the “known” measurements. In this case, we know from the corner of the house to the 4th truss is 7’-0’’. We also know the block wall is 8’’ Thick, so we subtract 8’’ from 7’-0’’ to get us 6’-4’’.
- Measure from the inside of the block 6’-4’’ and your truss should be in that location. Using a screw or nail, make a puncture hole through the drywall. If you hit wood, then there is a truss
- Not that you found the first truss, measure 24’’ on-center (OC) to find the remaining trusses and mark everything with a sharpie.

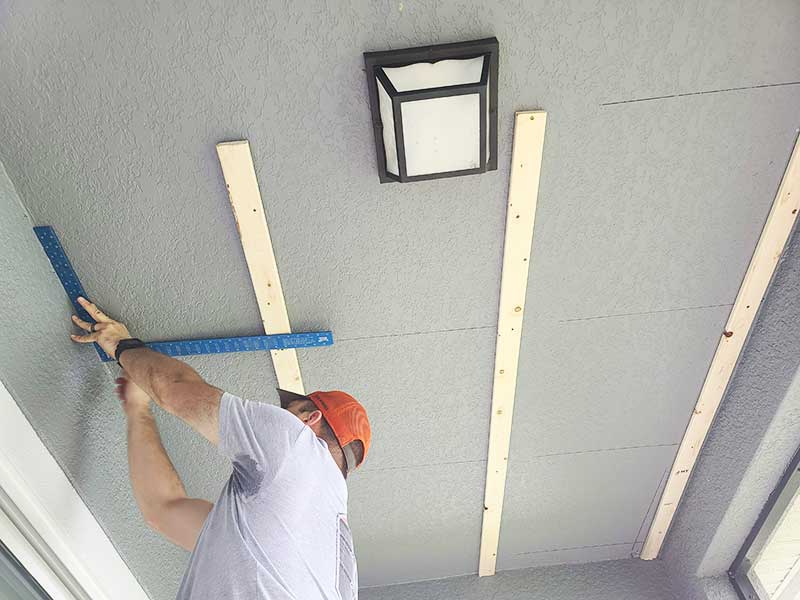
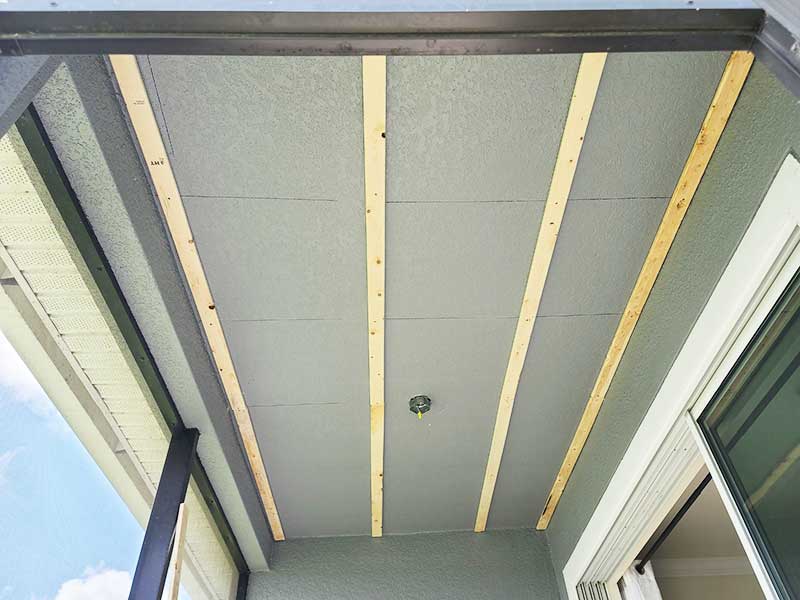
Installing the Furring Strips for Your Tounge and Groove Ceiling
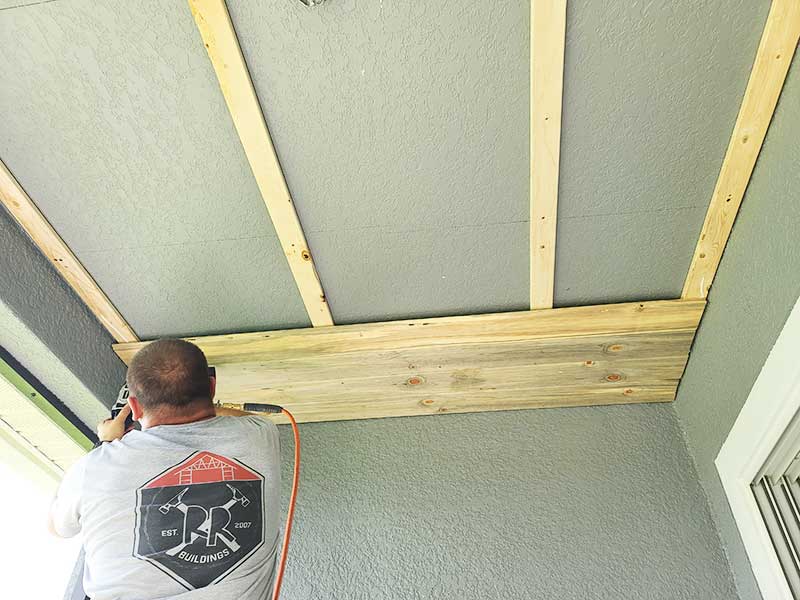
Now that you have located your trusses, you can start installing the 1×3 furring strips. By adding these, they give you a good nailing and gluing surface to install the tongue and groove boards.
Install the 1×3 Furring strips to the ceiling using #9×2.5’’ GRK fasteners screws. Use one screw for each truss. Make sure if you need to use more than an 8’, that you end and start on a truss. This way both furring strips can have a firm grip
Installing the Tongue and Groove Wood Plank
- Start by measuring the OVERALL length of the area you are installing the tongue and groove boards. In our case, we had to cover 11’-3’’ and we knew each board covered 5’’ so we divided 11’-3’’ / 5’’ and gave us 27 exactly to cover this area.
- We then measure the overall DEPTH (from sliding glass door screen) of the patio which was 71’’. We cut all of our boards to be ¼’’ Smaller to allow for the wood to expand and contract over time.
- After cutting all the boards, staging them and randomizing the colors to create a random color pattern, we started to install the boards by first running a bead of PL 375 Construction Adhesive to the furring strip.
- With the first board we started with the groove side facing the wall and installed the board using 2 18 ga. nails to each furring strip securing the board in place.
- An 18 ga. Finishing nailer makes quick and easy work of this. However, if you do not own one, you can still use a regular hammer and finish nails. Your shoulder and arms might be sore the next day, but you will still have a great ceiling!
- Using a rubber mallet or non-marking hammer, tap the groove on to the tongue of the already installed board making sure you have a solid connection and nail it off
- Repeat this process until it is complete, or you run into an obstacle like a plug or outlet.
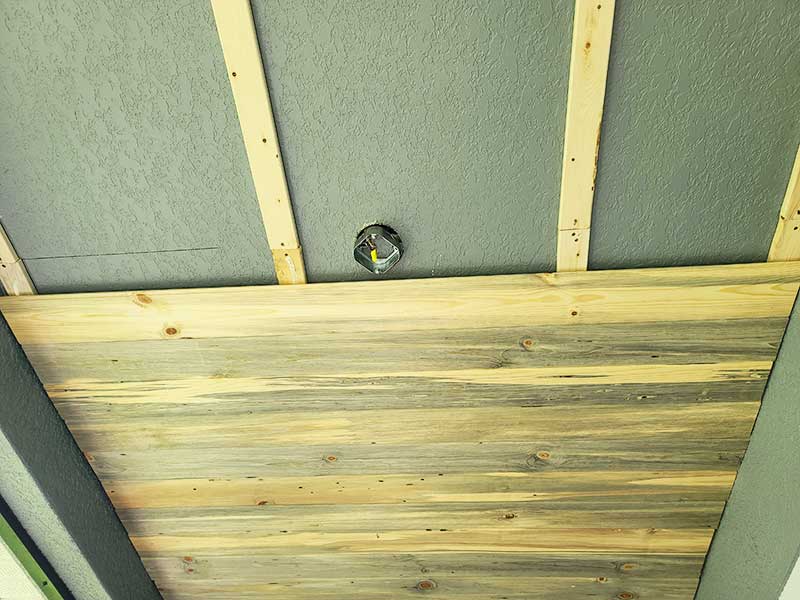
Cutting the Tongue and Groove Ceiling Planks for an electrical box
It’s common for a porch ceiling to also have some sort of light fixture. Creating the perfect gap for the electrial box is simple with the right measurements. We highly recommend adding a 1.5″ metal box extender to your tongue and groove porch ceiling since the furring strips are about 1.5″ deep as well, which will allow for a clean finish.
- Attach your electrial metal box extender directly to the existing box using 9×2.5’’ GRK fasteners screws.
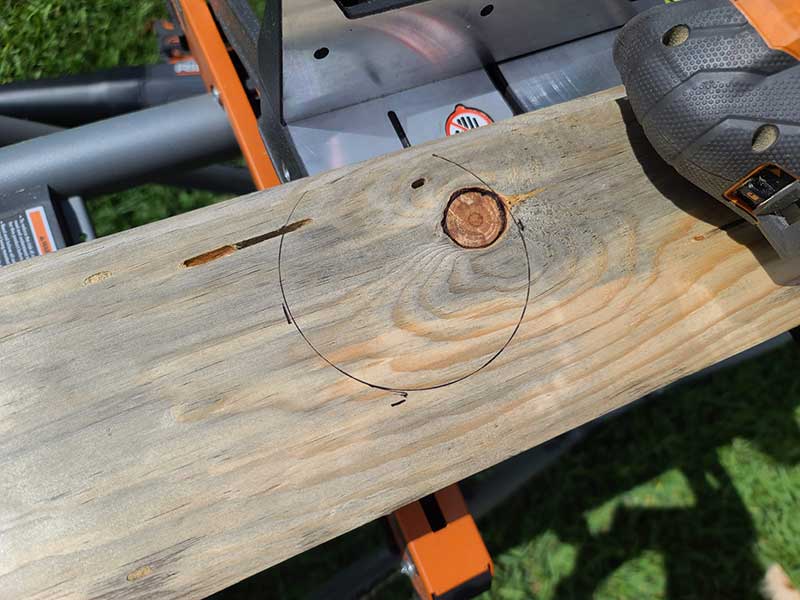
- Since we pre-cut all of our boards to be the correct length, we were able to orientate the board in the correct direction. When you do your layout, you want to have all your makings on the back of the board.
- Layout the opening you need to cut on the board by measuring the distance from the wall to the first edge of the box and transfer that measurement to board
- Measure the overall width of the box, and transfer that measurement to the board.
- Now measure the height of the box (if you used the octagon box, it should be the same size) and transfer that measurement to the board.
- Complete the measurements by creating a circle slightly bigger than the box. This circle will be your cut line.
Fun Fact: We used the lid of a 30oz Yeti Tumbler as our template which made a perfect size!
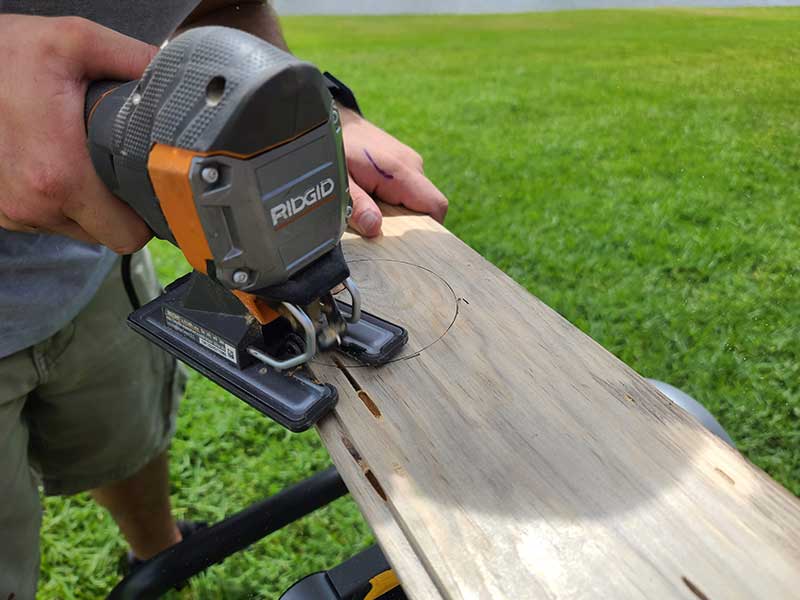
- Cut the opening using a Jig Saw scroll blade. These blades are thin and sharp making it super easy for cutting tight and round openings.
- If you measured correctly, when you install your board you should have a hole perfectly positioned for your switch or outlet. Don’t stress it if your edges are a little rough, the light or fan mount will cover them.

Finishing the Tongue and Groove Porch Ceiling
After you’ve cutting around your electrical box you can continue installing the rest of your T&G Ceiling as did in the beginning.
If you run into a situation, on your last board that it needs to be a different width, then you will need to a rip cut (cut the length of the board) down the length of the board. You can use a circular saw, jig saw or a table saw to complete this:
- First, cut the entire length of the tongue of the board you need to cut off.
- You will also want to cut ONLY the top part (this is what will face the ceiling) of the groove off by adjusting the blade depth of your circular saw or table saw to allow the board to just “pop” into place without hesitation
- Mark and measure the new width of the board and then rip cut the board and then install as you would any other board
Installing a tongue and groove porch ceiling was a quick way to add value and charm to this home. Much like our popular Shiplap Feature Walls it adds eye catching character to any space in your home.
This was a fun project for us and we loved seeing the HUGE smile on our friend’s face when she saw the finished product (wish we’d caught it on video!). Are you planning to put up a a tongue and groove ceiling? Show us your projects and tags us with #homemadebyhuseman.
More of our recent projects:

A Homeowener’s Guide for Building an Accessory Dwelling Unit
Inspiration for a Mountain Themed Nursery
Charming DIY Wooden Christmas Tree with How-To Cut and Build Guide

Top 12 Must Have Tools for DIY
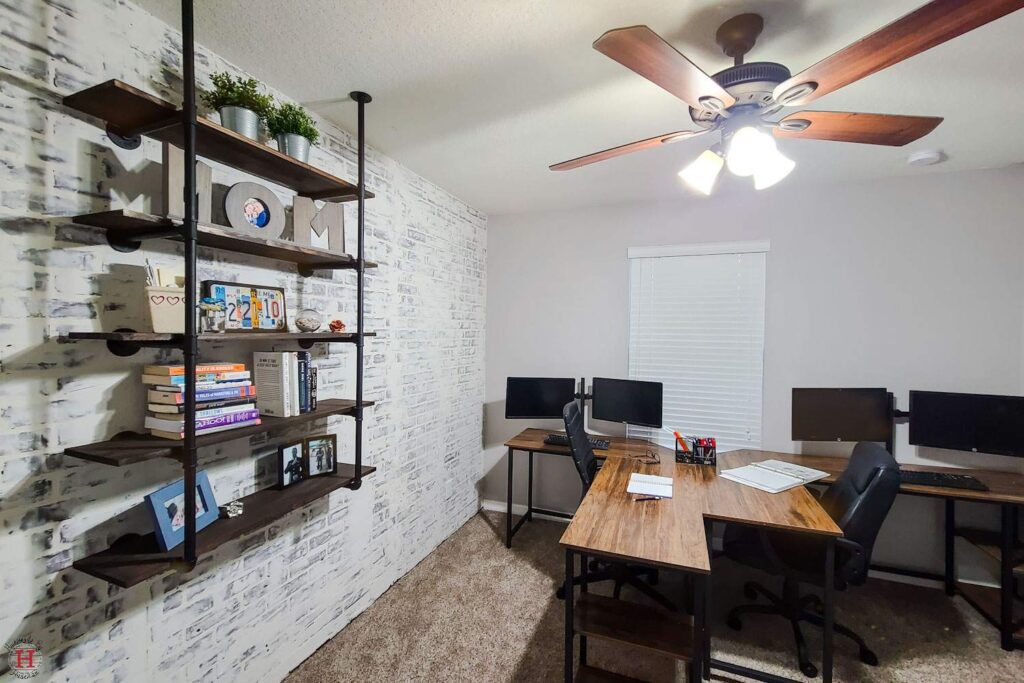
How to Build a Stunning DIY Faux Brick Accent Wall
HTV on Wood: How to Do It Right!
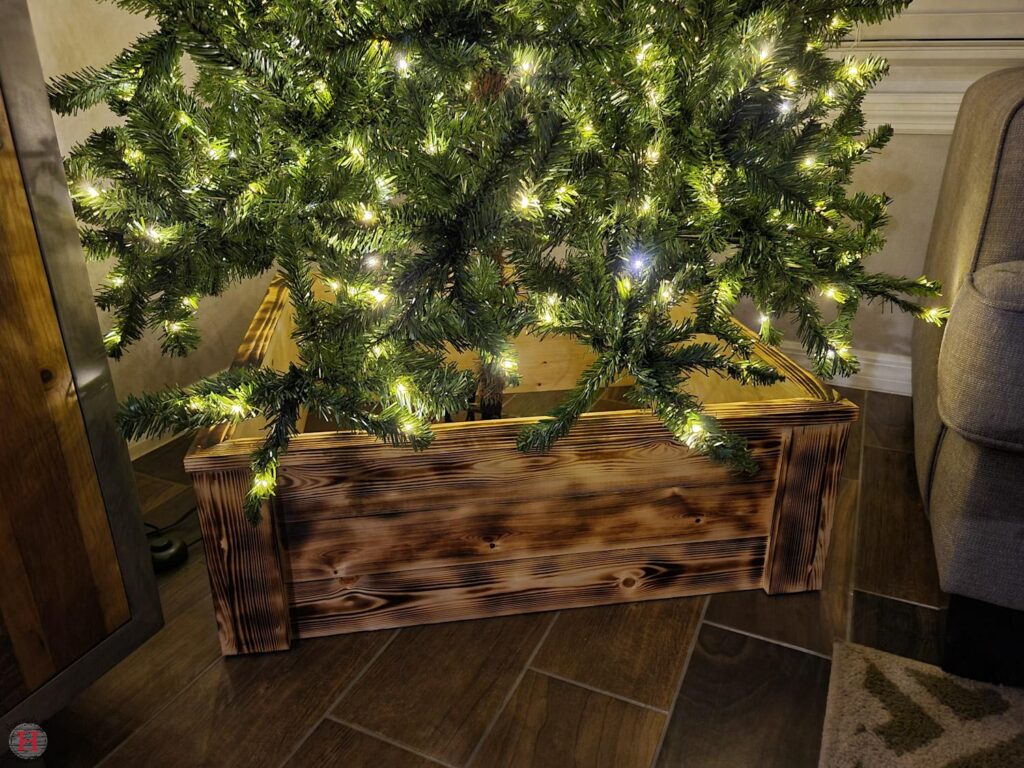
How to Build a Decorative Wooden Christmas Tree Box
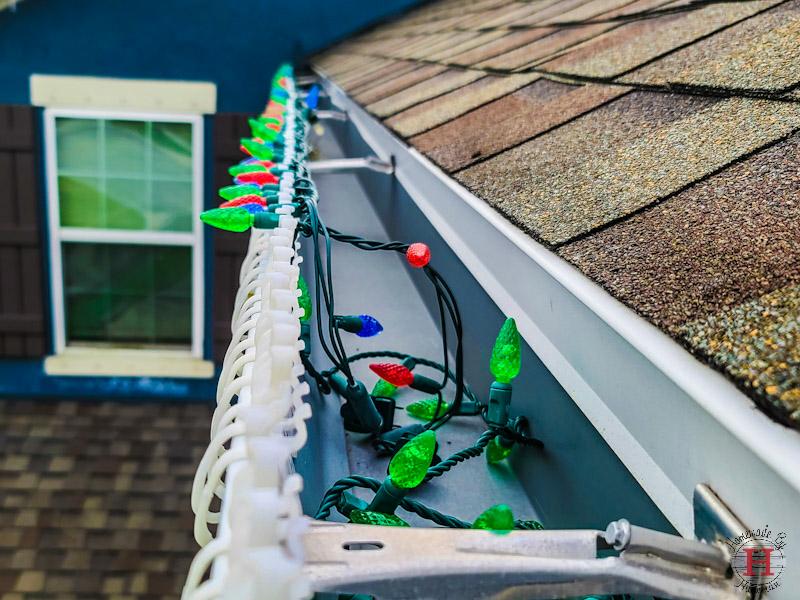
How to Make Your Christmas Lights Look Professional

How to Make a Round Wood Door Sign