I frequently saw the “print then cut” option in Design Space for my Cricut, but for some reason I was always a bit intimidated by it. I finally picked up some Avery fabric Transfer and decided to give it a try.
In the past, when I’ve used the Avery Fabric Transfers I’ve always used scissors. The cut was never clean, so it left an odd film. However, when you pair the Avery Fabric Transfers with Cricut print then cut, you can get a beautiful print for your shirt that’s quickly and easily applied with a heat press or even an iron.
- What are Fabric Transfers?
- When should I use a Fabric Transfer?
- What does Print then Cut mean?
- When should I use Print then Cut?
- How do I print on a Fabric Transfer?
- How do I cut a Fabric Transfer Sheet with a Cricut?
- How do I weed a Fabric Transfer Sheet?
- How do I transfer the image to fabric?
- How do I peel the fabric transfer?
- How do I wash a shirt with a fabric transfer?
What are Fabric Transfers?
Fabric transfers are sheets that you can print on with a regular inkjet printer, and then when applied with heat and pressure, that ink will transfer to your fabric.
When should I use a Fabric Transfer?
I love to use vinyl, but if a design is really intricate with a lot of colors, I find using a fabric transfer is much easier.
However, fabric transfers can be more likely to crack if washed and worn frequently and the colors may fade. So a Fabric Transfer may be a great option for a shirt you only plan to wear a couple times.
What does Print then Cut mean?
In Design Space, when you use a graphic, you have the option to print then cut. What this does is send your image to the printer to print your graphic with ink. It will print with a black square around it that your Cricut machine will use to identify the image and cut out around it.
When should I use Print then Cut?
Print then cut is great for when your image has a lot of colors that may not easily be cut with vinyl, or could be easily layered.
How do I print on a Fabric Transfer?
If you’re going to use your Cricut to cut out the image on a fabric transfer, it’s important to upload the graphic in Design Space as a print then cut image. Then when you click “Make it” it will first ask to send your image to your printer.
When using a light fabric transfer, you want to make sure you turn on the “Mirror” option, so your image prints in reverse. Once you press your image onto the fabric it will be correct (much like HTV).
I recommend using the bleed option, especially if there’s fine lines to cut around, like text. This will help make sure the ink is within the cut lines. When it prints it will look awful, text won’t be legible, but trust me, once it cuts it’ll look cleaned up.
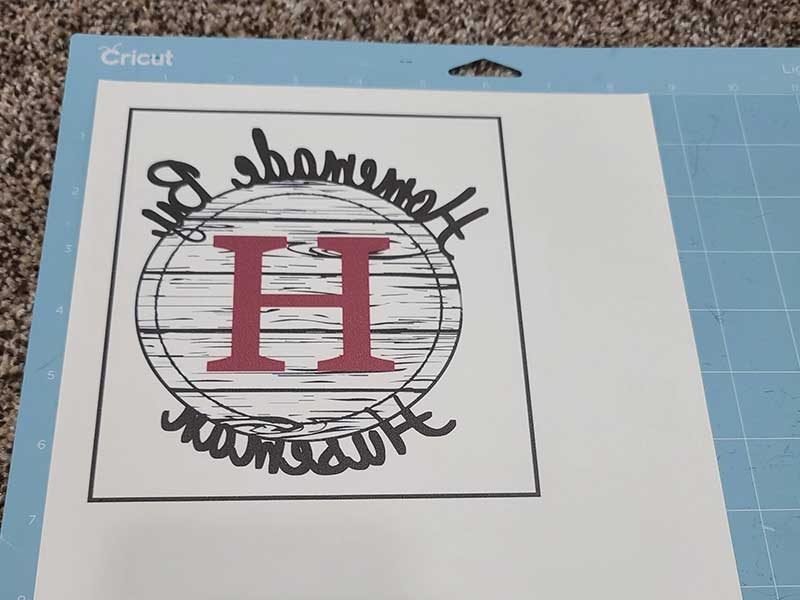
You’ll notice your image has a black box around it. This is okay. This is not a cut line, this is for your cricut to scan so it’s able to precisely identify and cut your image.
Before you print, load your fabric transfer sheet in the paper tray being mindful of which side needs to be face up for your printer to print on the correct (blank) side. It’s important that your printer is an inkjet printer, not a laser printer.
Once your fabric sheet is loaded, click print from Design Space. Your graphic should print on the blank side of the transfer sheet and in reverse.
How do I cut a Fabric Transfer Sheet with a Cricut?
Once you’ve printed from Design Space so your graphic has the black box around it, place the transfer sheet, graphic side up, on your mat in the location shown in Design Space. I find it cuts best if your paper is lined up as square as possible to the corner.
Set your base material to light card stock to ensure a clean cut through the paper. Load your mat and press Go to let the cricut do the cutting.
You’ll notice your cricut scans the black square first. The Cricut does this to help identify the exact location of your graphic so it can get a clean cut around the edges. However, if you choose the bleed image for the option, this gives a little bit of wiggle room in case the cut is a hair off you likely won’t be able to notice.
How do I weed a Fabric Transfer Sheet?
Weeding needs to be done very carefully. The ink on the transfer sheet will come off easily, so you’ll want to be careful not to scratch at the parts of the image you plan to transfer or there will be a gap.
I find it easiest to weed the bulk of the excess paper around it first, then carefully use your weeding tools for any small inner pieces. The fabric transfer sheet will weed like paper cardstock, where it cuts all the way through, not like vinyl where it only cuts one layer.
How do I transfer the image to fabric?
Once you’ve weeded the image, you’re ready to put it on your fabric. It’s best if you iron and run a lint roller over the area you’re putting the image on to avoid getting creases or lint in your image.
If you’re using a heat press, set it to 315 degrees. If you’re using an iron you’ll want to make sure it’s on the highest heat setting.
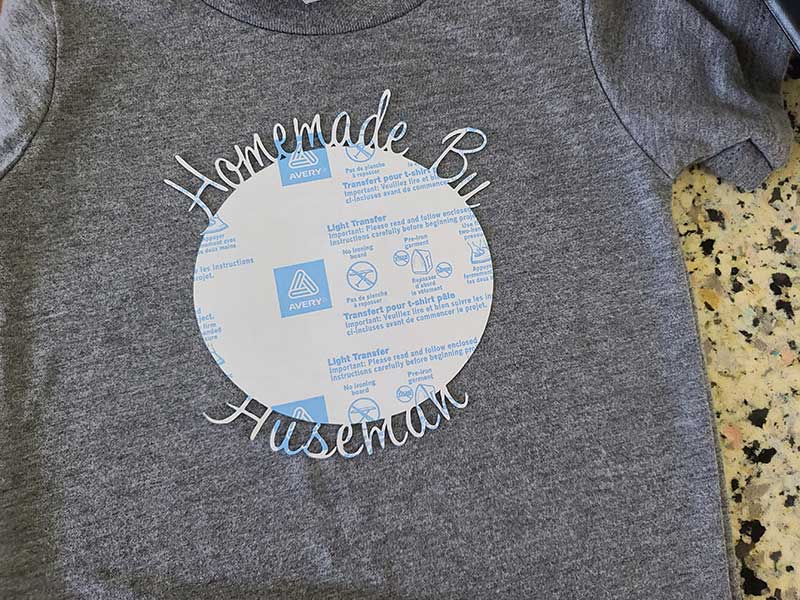
Place the fabric and the printed graphic face down on your heat press (or firm surface you plan to press on) and press for 30 seconds. If you’re using an iron you’ll want to make sure you’re using firm even pressure.
Allow the fabric and transfer sheet to cool before peeling.
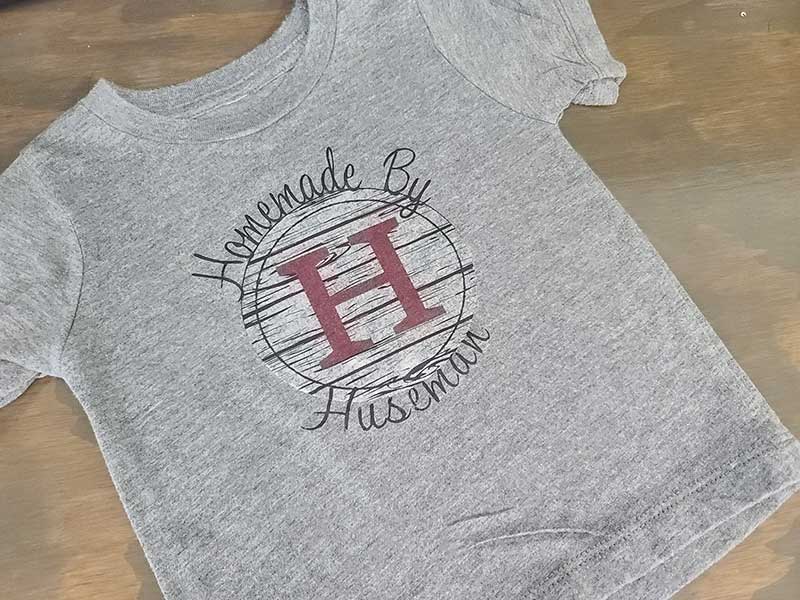
How do I peel the fabric transfer?
The fabric transfer sheets don’t peal quite as easily as heat transfer vinyl, but I did find the Avery website recommends “slightly tearing the edge (just the paper only) to help start the peeling process. First, grip the edge of the transfer and very gently bend the sheet until the backing paper tears slightly.” Once I got this torn piece off, I found the rest of it pulled off pretty easily.
The small cursive words were a little more difficult to peel, but the ink did transfer and stay. It was just the paper backing that was being stubborn.
Then once you’ve finished peeling the paper backing, you can marvel at your completed, beautiful new masterpiece!
How do I wash a shirt with a fabric transfer?
You’ll want to wash your fabrics with a fabric transfer inside out and in cold water. This will help prevent peeling and cracking.
Have you made a print then cut fabric transfer? We’d love to see it! Tag us on social with #homemadebyhuseman or @homemadebyhuseman
Check out more of our craft projects:
No post found!