If you’re trying to figure out how to make a round wood door sign, then you’ve probably also noticed just how stinking cute and homey they are! After seeing them everywhere I decided it was time to make one of my own and I’m just in love with how it came out.
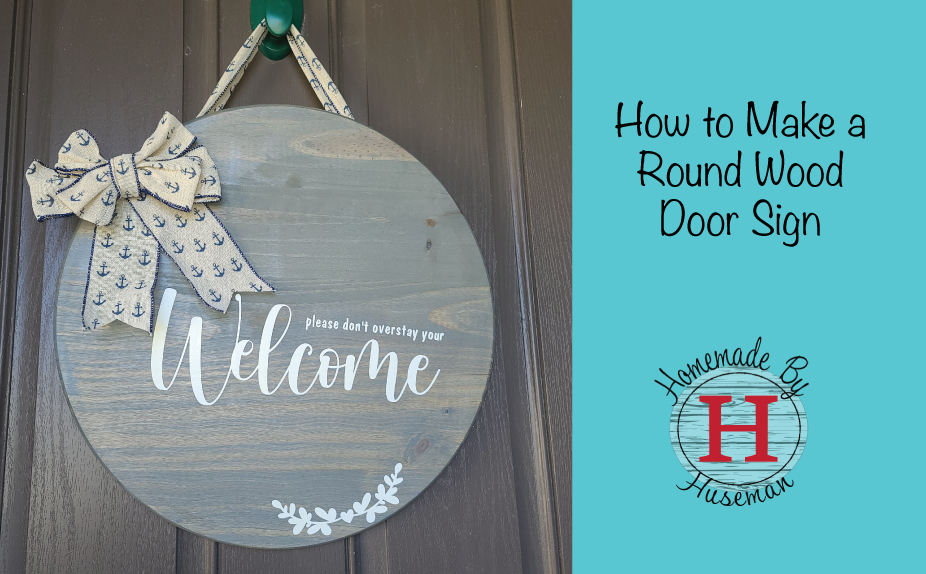
These round wood door signs are actually pretty simple and I plan to make more to match the changing season’s decor. Something I noticed when exploring designs is that less is more. There are a variety of different ways to decorate them, but I found the best way was to use a simple wood stain, outdoor permanent vinyl, and a bow. Other options would include paint for solid colors, flowers or other greenery, stencils instead of vinyl, or precut decals instead of creating your own.
When planning how to make a round wood door sign, I thought about cutting my own wood from something like a piece of plywood with a jig saw, but then I realized most craft stores and home improvement stores already have this round wood readily available! So you literally just have to decorate and hang.
The only thing I did to the wood round was give it a light sand so it would have a smooth finish of the top to help the vinyl get a better stick.
For this post, I will tell you exactly how I made mine, but you can always change it up to fit your needs. It’s actually very similar to how I made by DIY Growth Chart Ruler, but with some tweaks for outdoor use.
Interested in getting a personalized vinyl decal for your round wood door sign? Or want us to make the whole thing for you? Click here to send a request and we’ll send you a personalized free quote.
Project Details:
Skill Level: Beginner
Project time: 4-5 hours, including stain and varnish dry time
Materials:
- 1 Wood Round
- Wood stain
- Cricut Premium Permanent Vinyl
- Transfer Sheet
- Clear Satin Water-Based Outdoor Spar Urethane (optional for sealing)
- Pre-made Burlap Bow or about 2 ft. of burlap ribbon to make your own
- 1 ft. of burlap ribbon (for hanger)
- Sandpaper or sander
- Cricut Machine (I use an Explore Air 2, the Joy is too small for this particular design)
- Standard Grip Cricut Mat
- Sponge brush
- Staple gun
How to Make a Round Wood Door Sign
Prep The Wood
- Lightly sand the wood round for a smooth finish.
- Stain or paint the wood round and let dry completely, a minimum of 2 hrs.
Create the Vinyl Decal
- While you wait for the stain to dry you can start cutting your vinyl design. You can use our design here. I used premium vinyl and found I got a better cut on the “Iron-on” cut setting vs. the recommended custom setting for premium permanent vinyl.
If you don’t have a vinyl cutting machine or want a custom design, request a decal or design file here. - Once you’ve cut the vinyl, you’ll weed out the negative space so just the design remains.
- Cut the transfer paper to just slightly larger than your design and place the sticky side down over the top of your design.
- Press firmly across the whole design to adhere the design to the transfer paper. Pressing with a plastic card helps.
Apply the Vinyl Decal
- When your wood round is dry and you’re ready to apply the vinyl, flip your design over and gently peel back the backing of the vinyl. Do this slowly and trim away the excess as you peel it away. The more paper backing you’re trying to control, the more difficult it becomes.
- If the vinyl does not stick to the transfer paper press firmly again or try rolling the paper back very slowly, almost folding it in half. Be careful not to let the sticky side of the transfer paper or vinyl fold into each other.
- Once your vinyl is successfully on your transfer paper it’s ready to go on your wood round. Ensure the wood round is free of debris and decide which way you want your wood grain to go (horizontal is most popular).
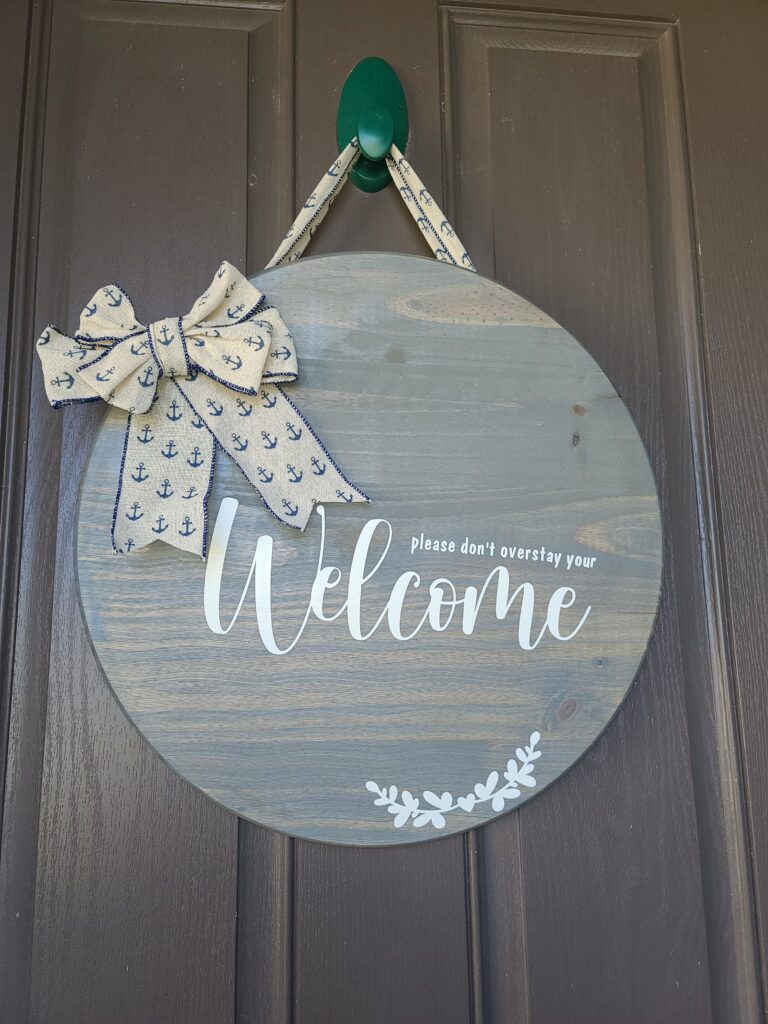
- Determine where you want your decal to go, in this case, I wanted mine off-center to leave room for the bow at the top left. Once you know your position, start in the top right corner of the decal to press it down firmly onto the wood and then slowly make your way across until the whole design is pressed down. Do this slowly to avoid any bubbling under the vinyl, however, in most cases this can be pressed out with firm pressure using a plastic card.
- Once your design has been pressed into the wood, slowly peel back the transfer paper, slowly again similar to how you removed the paper backing.
- Take a brief moment to appreciate your design! This is one of my favorite things about using my Cricut.
Seal the Wood Round With the Decal
- Before attaching any 3D type decor, like the bow or flowers, you’ll want to seal the wood and vinyl using the uretherne. I prefer satin to keep a natural look.
This step isn’t necessary with premium or outdoor vinyl, but I like to do it for a little extra protection from the outdoor elements to help the design last longer. - Give the sealer a couple of hours to dry completely. While you wait for it to dry you can make your bow if you don’t have a premade one.
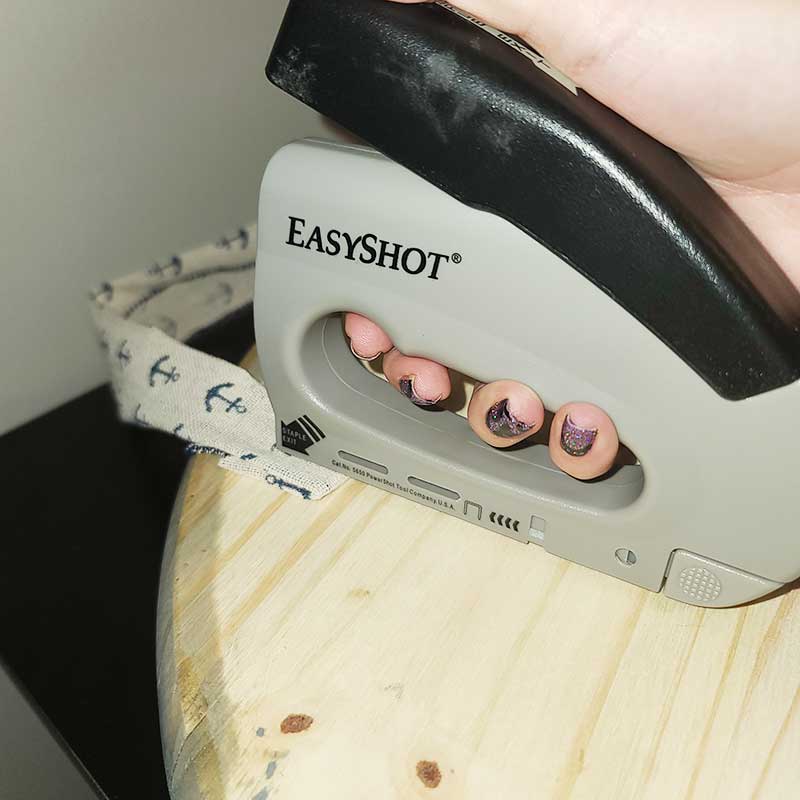
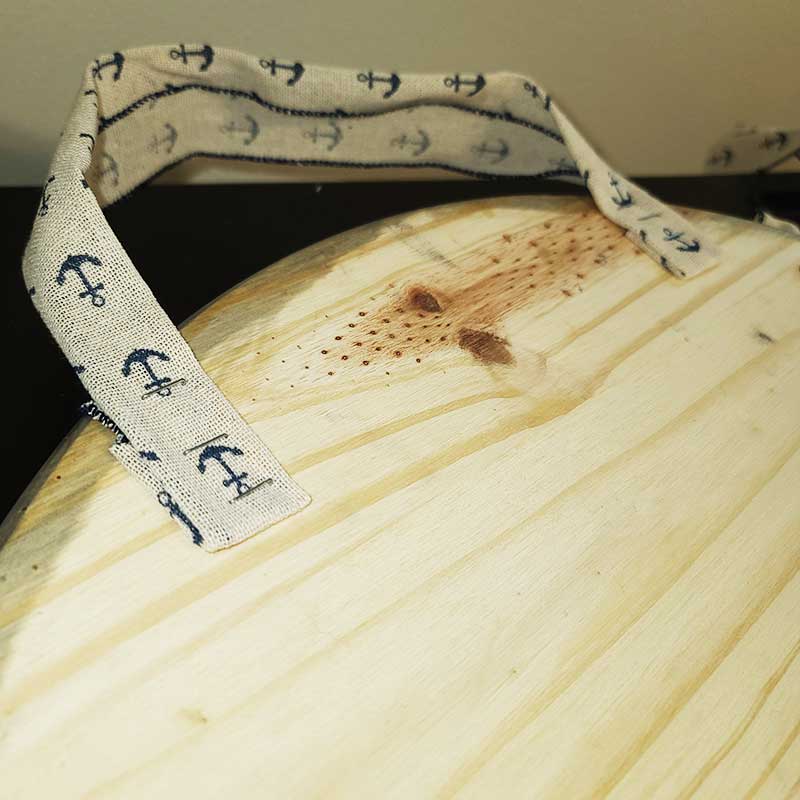
Attach the Ribbon Hanger & Bow
- Once the wood is dry to the touch and no longer has a glossy look, flip it over to attach the ribbon for hanging. Use 3-4 staples on each end of the ribbon to ensure a firm hold for the weight of the wood. Since my ribbon was wide I folded it into 3rds to give it a balanced look.
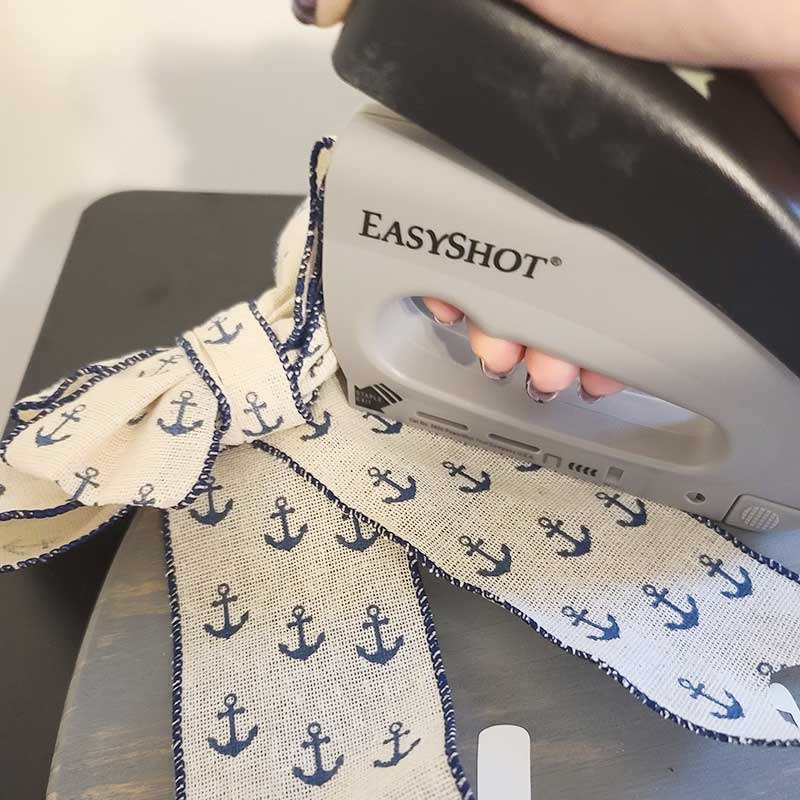
- Now that you’ve attached the ribbon to the back you can attach your bow (or any other 3D elements). I added a staple to each long ribbon of the bow as well as one inside the bow loops to ensure it stays put.
- Hang your new sign on the door and let your guests admire it!
I hope this was a helpful tutorial for how to make a round wood door sign! I absolutely love them and love how easy they are to make for a little extra charm for your front porch. Are you ready to make a round wood door sign? Tell us what you plan to put on yours in the comments.
Like this? You’ll love these:
No post found!
Thanks so much for the blog article. Thanks Again. Cool. Elise Lambert Maribelle