
In this post, we’ll give you all the steps and materials you need to build a decorative wooden Christmas tree box. This rustic-style wooden Christmas tree box is the extra touch of cozy decor to elevate the look of your Christmas decorations. This box is perfect to replace an old tree skirt and we think it gives the tree a more lively look since it looks like it’s sitting in a little planter box.
We absolutely love to decorate for Christmas, so this project was a no brainer and we were surprised how quickly it came together! Check out the video to see it come together piece by piece and find it’s home in our living room.
For our box, we opted for a burned look, but you could certainly stain or paint the wood for the color or style you’re going for. We thinking burning the wood offers a classic rustic look without the mess and hassle of staining. This box is designed for a 7.5″ tree with a wide base, if you have a smaller or larger tree, you may opt to scale down the sizing up or down. You will essentially need 8 1×4 pieces of equal length for each row of height for the width, 8 1×3 pieces of equal length for the height, and 4 1×2 pieces for the top trim.
If you need assistance in personalizing the specs for your box, please email us at homemadebyhuseman@gmail.com.
Materials Required:
- 4 – 1x4x8’ Spruce Pine Fir (SPF)
- 2 – 1x2x8’ Spruce Pine Fir (SPF)
- 1 – 1x3x8’ Spruce Pine Fir (SPF)
- 1-¼’’ 18 Ga. Finish nails
Tools Required:
- 18 ga. Finish Nail gun with an air compressor (Or a hammer, but it will take much longer)
- Table Saw (If you decide to make the rip cuts)
- Miter Saw or Circular Saw
- Pen or marker
- Tape measure
- Propane Torch
- If you do not have access to an air compressor you can use finish nails with a hammer or use GRK Fastener Trim screws with a drill.
DIY Skill Level: Beginner
Time Frame: This project took us about 4 hours to cut, assemble and burn the wood
How to Build a Decorative Wooden Christmas Tree Box
Build 1×3 Squares
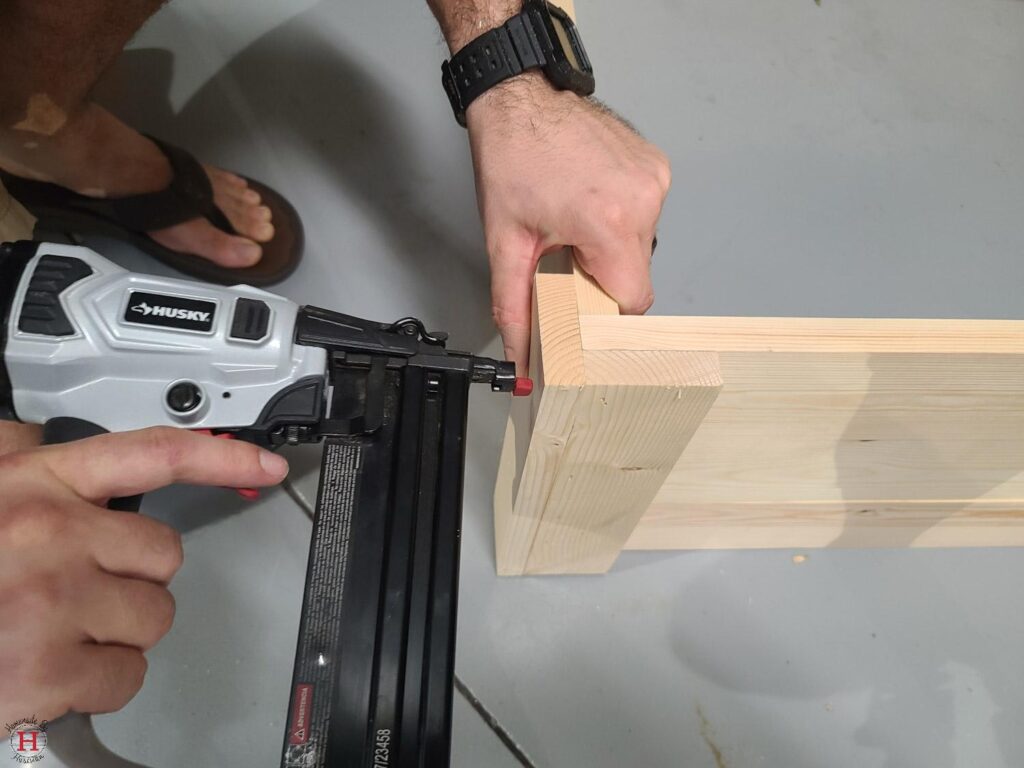
- Measure and cut the 1×4 boards to 30’’ long. You will need a total of 12 1x4x30” pieces, each 1×4 should create 3 pieces.
- Create a square with 4 of the 1×4 boards. Nail the face of one board to the edge of another making sure to the corner nice a flush. I used about 4 nails per corner.
- Repeat this to create 3 squares. Stack the squares on top of each other.
- Keep the 3 squares as close to flush with each other
Stack and attach the 1×4 squares
- Measure and cut the 1×3 boards to a length of 10.5’’ long. You will need a total of 8 1x3x10.5” pieces to create the corner trim.
- Nail the trim boards together along the edge creating an “L” shape, then nail them to the stacked squares.
- Repeat these for the remaining 3 corners. For a professional look, keep the “L” facing the same direction so it looks consistent.
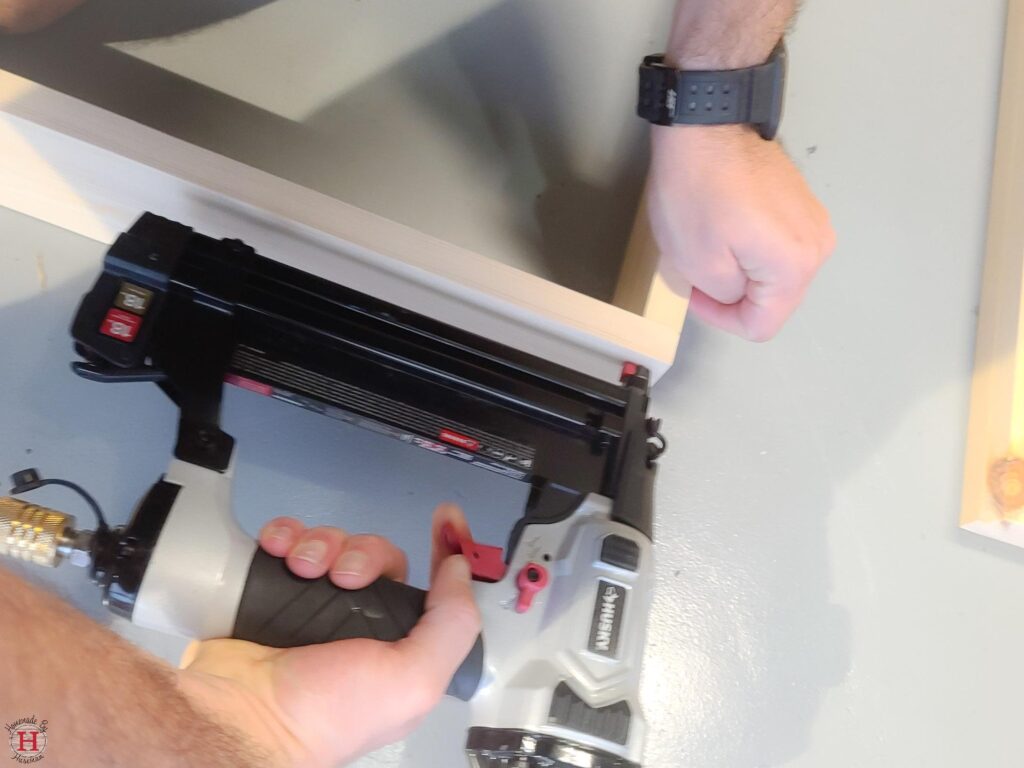
Installing the trim:
If you opted to rip the 1×4 into 2 pieces, measure the halfway point and then set up the fence of your table saw. Run the board through making sure to keep the edge as close to the fence as possible to create the 2 “1×2” trim boards
NOTE: These steps are if you are mitring (45 degree) the corners together
- Start with one of the 1×2 boards and cut off one end at a 45 degree angle.
- Lay the trim face (wider side) on top of the box with the short side facing the inside of the box and the long side facing out.
- Align the edge of the short side to the inside corner. On the opposite corner, mark the inside corner with a pen.
- Using a speed square, continue the mark up on the skinny side of the trim board and from that line create the 45 degree angle. (Note: This angle should be opposite of the first cut)
- After each cut, nail each board in place and then repeat these steps to create the trim on all 4 sides of the box.
A Burned Wood Finish
Burning the wood is not a necessary task, but if you’re going for the rustic look it an easy and simple way to get there. If you choose, you can also stain or seal it with your color choice.
- With a Propane torch, lightly start a sweeping motion over the wood to warm it up, being careful not to let the flame stand in one spot for too long.
- Keep the sweeping motion up until you reach your desired level of burned wood.
Because this will be sitting indoors and not affected by the weather, we chose not to apply a clear sealer on the wood. This will also help it look more natural and prevent it from turning yellow.
If you thought this tutorial for how to build a decorative wooden Christmas tree box was helpful, we’d love hear what you think in the comments. And if you decide to build it, we can’t wait to see your finished product! Tag us on social with #homemadebyhuseman.
We’re always looking for new tutorial ideas, have something you’d love to learn how to build? Submit your ideas on our Contact Us page and it just might be feature as our next DIY project.
Like this? We think you’ll love these projects too!
No post found!
I’m extremely pleased to discover this website. I wanted to thank you for ones time just for this fantastic read!! I absolutely enjoyed every part of it and i also have you bookmarked to see new stuff in your site.
Definitely, what a great blog and revealing posts, I definitely will bookmark your site. Best Regards!