Adding a climbing ladder to your kid’s room or playroom is a fun way to add a new element without using up a lot of floor space. This ladder attaches directly to the wall and could even continue along the ceiling for monkey bars.
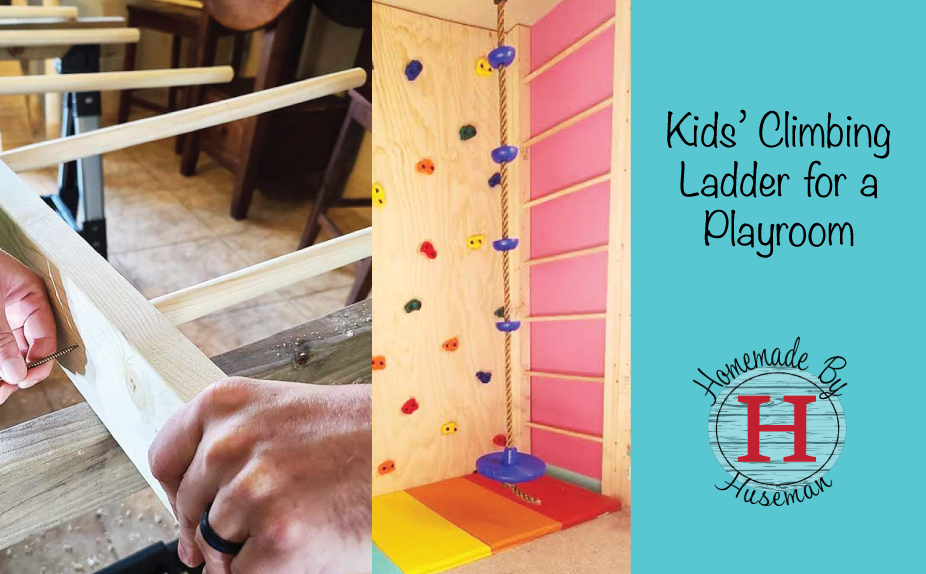
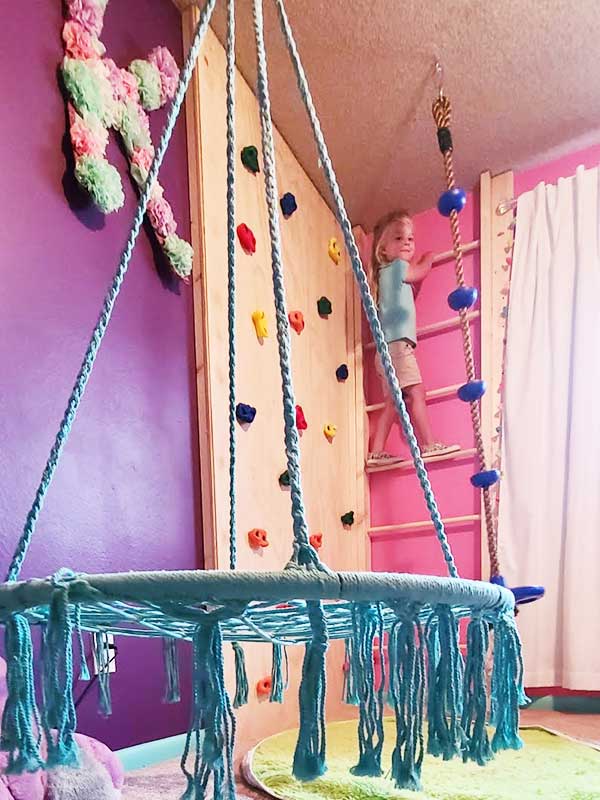
We built this ladder for a friend in their playroom with a rock wall, rope swing, and hammock swing. Check out our list of playrooms must haves for an adventurous kid. These were all added when parks were closed because of COVID-19 and their 4 year old needed something to play on.
Building the ladder to attach to the wall can be a little tricky since we wanted it to be super secure to the wall. So what we did was attach (2) 2×4’s flat on the wall which we used to anchor the actual ladder rails too.
I feel I should add, this ladder is NOT designed for adults and not intended to hold more than 75 lbs.
Project Time
2-3 hours
Materials Needed
| QTY | Material | Uses |
|---|---|---|
| 4 | 2 in. x 4 in. x 96 in. Prime Whitewood Stud | Ladder Brackets and Ladder Rails |
| 5 | 2 in. x 48 in. Wood Round Dowel | Ladder Rungs |
| 1 | #9 x 3-1/8’’ in. GRK Screws | Ladder Rail to Ladder Brackets |
| 1 | GRK #9 x 2-1/2 in. RSS Screws | Ladder Brackets to Wall |
| 1 | GRK #8 x 2-1/2 in. Cabinet Screws | Ladder Rungs to Ladder Rail |
| 1 | Titebond III 16 oz. Ultimate Wood Glue | Ladder Rungs to Ladder Rail holes |
| 1 | Plastic Wood-X. All-Purpose Wood Filler (Optional) | Filling Cracks and Screw holes |
Recommended Tools
- Tape Measure
- Pen or Pencil Square or Straight Edge
- Stud Finder
- Circular Saw / Miter Saw / Table Saw
- Drill and/or Impact Driver Ridgid Jobmax with Oscillating tool attachment
- T25 Star Drill Bits (usually included in the GRK Box of screws)
- Putty Knife
- Spade or Paddle Bits
Instructions to build a kid’s climbing ladder
- Prep the wall by removing any base boards or looking out for electrical. Try to avoid a plumbing wall, just in case a screw gets driven too far or in the wrong location.
- Find the center of 2 studs or furring strips using the stud finder and marking there location
Installing the Ladder Brackets
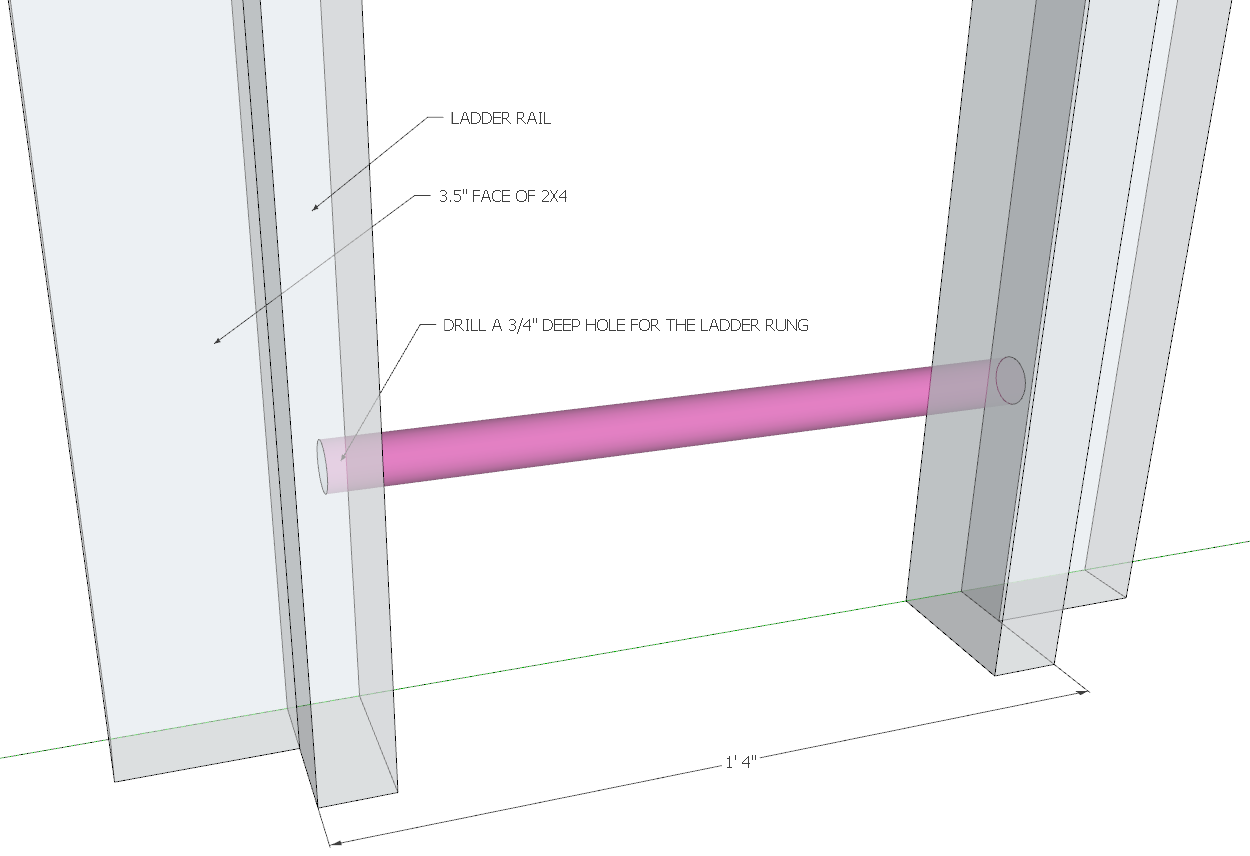
- Making sure the 2×4’s are plumb (Straight up and down) attach the 3.5’’ wide face (the flat side) of the 2×4 to the studs or wall furring strips you just located using a 2-½’’ long screws (this can be longer if you want it to be and have the ability). The ladder brackets can be centered on the stud or furring strip.
Assemble the ladder
- Measure the distance between the two studs you just attached to the walls.
EXAMPLE: Let’s say it was 16’’. Subtract 1.5’’ from 16’’ and that gives you a length of 14.5’’ for the ladder rungs.
- Cut the wooden dowels to be that length. Make sure that you have a firm grip on the dowels if you are using an electrical saw. These may try to twist or rotate on you while you’re cutting this material
- Measure and Space the rungs evenly apart. We spaced them 12’’ O.C. and centered on the 3.5’’ face of the ladder rail
- Drill ¾’’ deep holes into the 3.5’’ face of the ladder rail for your ladder rungs using a spade bit slightly larger than the wooden dowel. We purchased 1’’ dowels and used a 1-⅛’’ spade or paddle bit
- Clean out each hole and add Titebond III Wood glue to each hole, and then screw together using #8×2.5’’ GRK Cabinet Screws. (We used cabinet screws because of their strength, washer head and thin diameter to not split the wooden dowel.)
Installing the ladder
- Install the formed ladder between the 2×4 ladder brackets by sliding the ladder into place and screwing the ladder rails to the ladder brackets using #9×3.-⅛’’ GRK screws every 8’’ on-center. For better strength, you can add wood glue between the ladder brackets and the ladder rail.
- For a clean, smooth finish, you can caulk and wood fill all the seams and joints
Want the Rock Wall to match with this project, find the tutorial here »
Did you make this project? Thinking it might be your next one? Let us know and share on social with #homemadebyhuseman!
Check out more of our recent projects:
No post found!