A chevron wall doesn’t have to only live in professionally designed rooms and model homes. Creating one is actually easier than you may think and can take your room from average to impressive in just a weekend. Follow our steps with the recommended tools to create your own DIY chevron wall that you can admire every day in your home.
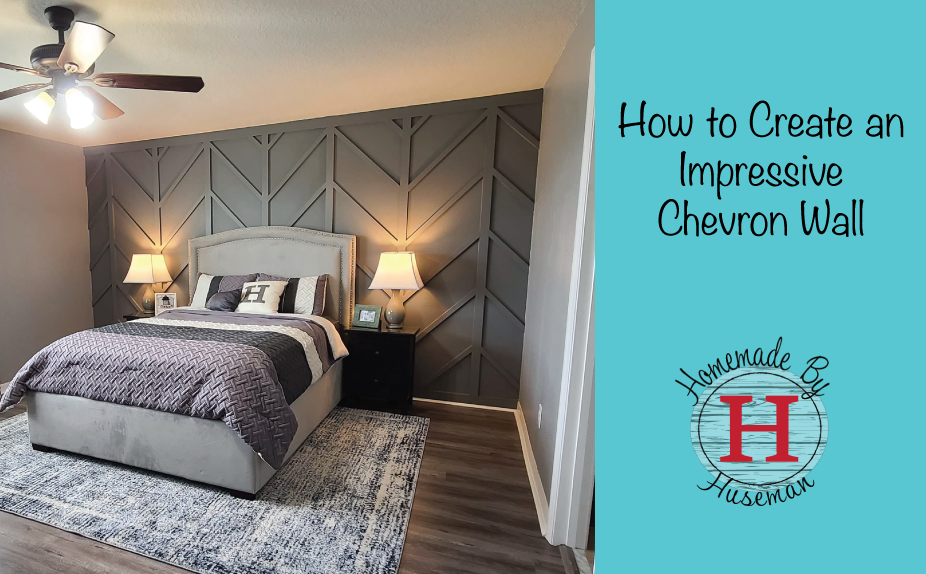
DIY Skill Level: Intermediate
Time Frame: Approximately one weekend
Materials Required:
- 1x4x8’ Primed Finger Joint (Used on the top trim and new base board)
- 1x3x8’ Primed Finger Joint (Used for the vertical trim)
- 1x2x8’ Primed Finger Joint Used for the diagonal cuts)
- GRK Fasteners #8 x 2 in. Star Drive Trim-Head Finish/Trim Screw (100 per Pack)
- Loctite PL 375 Construction Adhesive
- DAP Alex Plus Caulk (White)
- 18ga. Finish nails (if you have a nail gun)
- DAP Plastic Wood Filler
Tools Required:
- Miter Saw or Hand Saw
- Pen or marker
- Tape measure
- Framing Speed Square
- Calculator
- Caulk Gun
- Random Orbit Sander with 220 grit sandpaper (minimum)
- Shop Vac (attached to the sander)
Optional – But not required
- Nail Gun with air compressor (Or a hammer, but might be a pain in the butt)
- 18 ga. Finish Nail gun
Pro Tips and Notes for a Chevron Wall:
With this chevron wall, we found that the more prep work you do, the easier and faster this process will go. What do we mean by prep work? We’re talking about planning. Knowing the size of your wall, the spacing you want between each vertical board and how many chevrons you want will help you make quick cuts and allow for an easy install.
If you’re planning to paint the wall a different color, we recommend painting the wall before adding the trim so you only have to paint the trim boards and caulk lines when you’re done.
Installing Baseboards:
- Prep the wall by removing any base boards at the bottom of the wall
- Use a 1×4 and press it tight against the wall and against the baseboard perpendicular to the wall of baseboard you removed. Mark the thickness of the 1×4 on the existing baseboard using a pen or pencil. This line will be your mark to cut the baseboard to be flush and the new 1×4 baseboard can slide behind it.

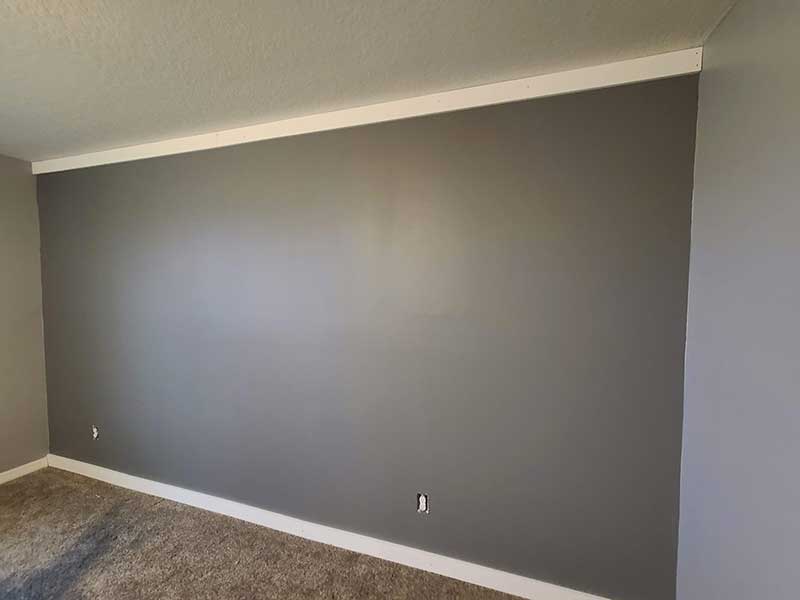
- Using the Ridgid Jobmax Oscillating tool, we cut and removed the baseboard. Making sure that you cut on that line. Try not to cut too much, but if you do, this can be filled in with a simple latex caulking.
- Install the 1×4 trim to the top and the bottom. In this case, we preferred to use #8×2’’ GRK Fastener Trim Screws. These can be added to just the bottom plate, or they can also be added to the vertical studs.
Installing Vertical Trim Boards:
This can be done in one of two ways. You can nail/screw the vertical boards to the studs or you can use Construction Adhesive and “glue” it to the wall. For us, it was easier to glue the vertical trim to the wall. We did this primarily because the spacing we wanted between vertical boards did not match the studs behind the drywall.
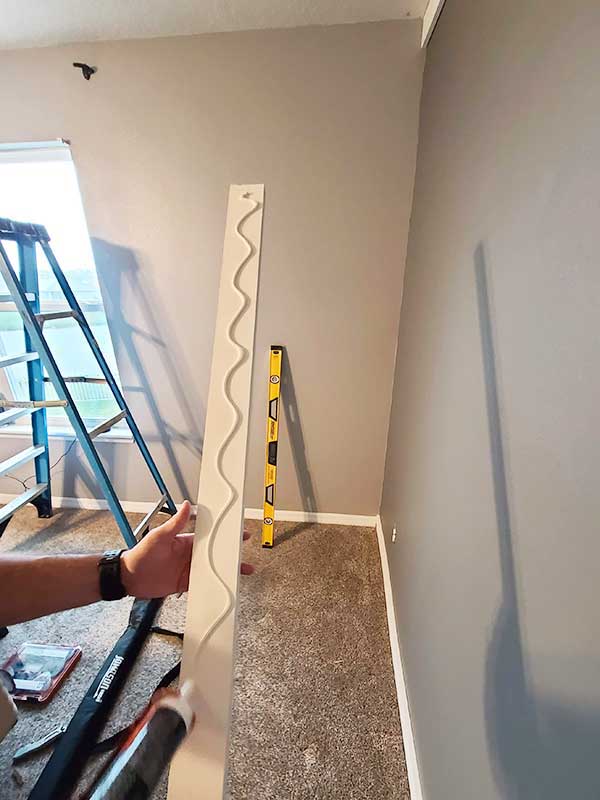
Measuring is also SUPER CRITICAL to installing the vertical trim boards. Take your time to make sure they are straight, and spaced equally. We promise this will make installing the chevron trim a lot easier and faster!
- Start by finding the center of the wall by measuring the overall width and diving that in half. Make sure you are precise when marking the halfway point. Mark it on the baseboard.
- Find and mark the center of your first 1×3 and add a generous bead of construction adhesive to the backside of the 1×3.
- Line up the halfway mark on the 1×3 to the halfway mark on the baseboard.
- Using a level (preferably 48’’ or longer) make sure the 1×3 is installed perfectly vertically and press on the board firmly to let the adhesive spread out. We used screws to temporarily hold the vertical trim to the wall while the glue dries.
- Now measure or layout the rest of the vertical boards to the spacing you want. We spaced our’s 24’’ OC or 1’-9 ¾’’ inside to inside
- Repeat step # 8 until all the boards are installed. If you are able to locate a stud, you can screw the boards to the wall rather than using glue.
- Make sure to clean-up any residue along the edges from any extra glue that seeped out while it is still wet. This will make for a better finish and easier touchups.
Measuring the Chevrons:
Before installing the chevrons on your wall, let’s first talk about how to find the measurement(s) for this. Remember how we said to time to make sure they are straight, and spaced equally? That is because you will only need to find this measurement once if you did it correctly to produce all the chevrons (with the exception of the ends if they didn’t come out equal)
Let’s start with what we know….
- We are installing our chevrons at a 45° angle, because of that “A” and “B” will be the same.
- We know that the the side dimension is 1’-9 ¾’’ or 21.75’’
For this example we will leave everything as Inches and decimal point
- Set-up your formula with the known measurements: 21.752 + 21.752 = C2
- Square the “A & B” measurements & add them together 473.0625+473.0625=946.125
- Now find the square root of the total: 946.125 = 30.75914
So we now know that the overall length of the chevron will be 30.75’’ or 2’-6 ¾’’
Installing the Chevrons:
Now that you have your measurements for your chevron wall, set up a cutting station that will make repetitive cutting easy. We have the RIDGID miter saw stand which includes a built-in stop block. The stop block is great for making repetitive cuts and not having to measure every single time.
- Start by cutting the edge of the 1×2 off at a 45° angle. Get as close to the end as possible.
- Measure the distance that you calculated (30.75’’), keeping in mind that you need to keep the same angle on both ends.
- Cut the required number of pieces to complete the chevron wall.
- While you are cutting the Chevrons, cut a 16’’ (or your designed spacing) spacing jig. You can use this to create the even and consistent spacing between the chevrons. The jig will also need to have a 45 degree cut on each end.
- Starting by laying out the pattern on the floor making sure that the pattern will be symmetrical starting from the center and working your way out.
- Take the first piece and install it tight to the corner of the first vertical and ceiling trim.
- Nail or screw the 1×2 angled board to the vertical by going from the ¾’’ side if the 1×2 into the ¾’’ side of the 1×3. If you use the GRK Trim screws, go slow. This will allow the screw to properly pre-drill not split the wood.
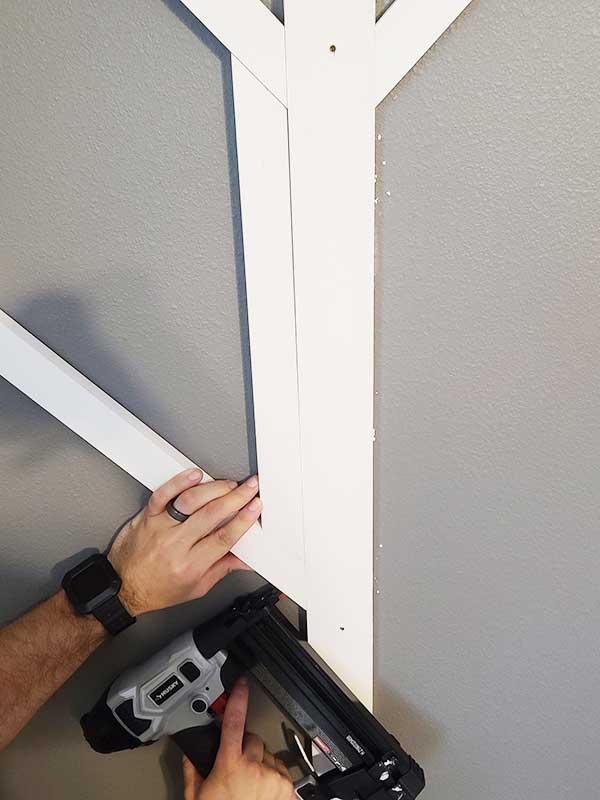
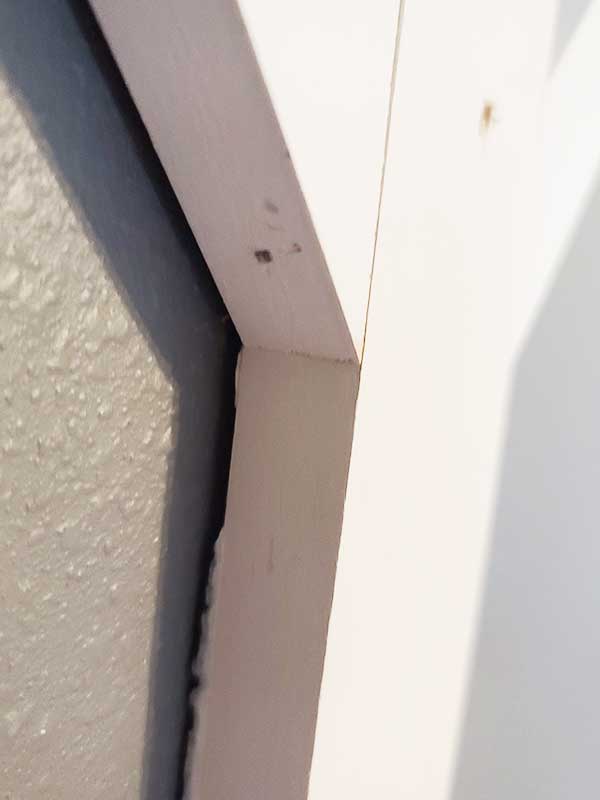
- Continue this process until the wall is complete.
- If your end columns are a different width than the rest(due to running out of space), repeat steps 12-18 with the new measurement. You can also do this with the top and bottom if you don’t have enough space for a full chevron to complete the look.
Finishing the Chevrons:
- Once you have all the chevrons installed, you can start the finishing details
- Start by using a wood filler to fill all the joints, seams (wood to wood) and nail/screw holes. Do not use a thin coat. You will want this to be applied in a thick, even matter. Let this dry thoroughly, overnight is best.
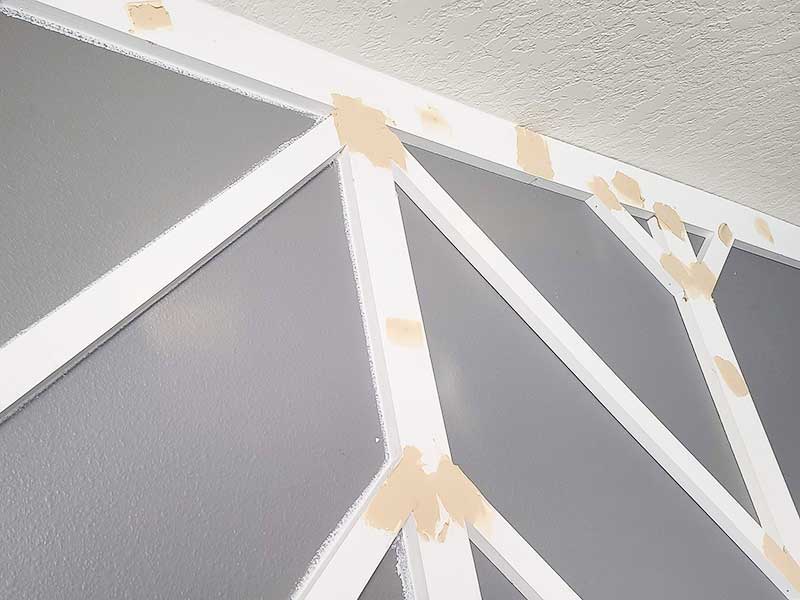
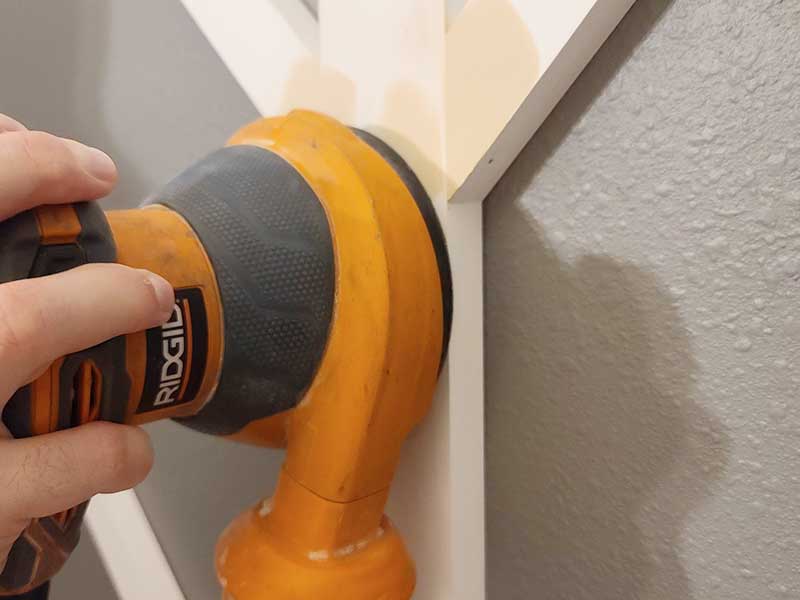
- Using a Random Orbit sander attached to a shop vac (this will help cut down on the dust) sand all the excess wood filler to a smooth and flush finish. If you feel like you need to add more, feel free to do so.
- Next, go through in a systematic way, and start caulking all the seams (wood to drywall). We found that caulking the “columns” was very effective.
- Finally, you can paint the wood trim to either match the wall or a contrasting color. Check out our tips for painting posts for the best tips on how to paint a room.
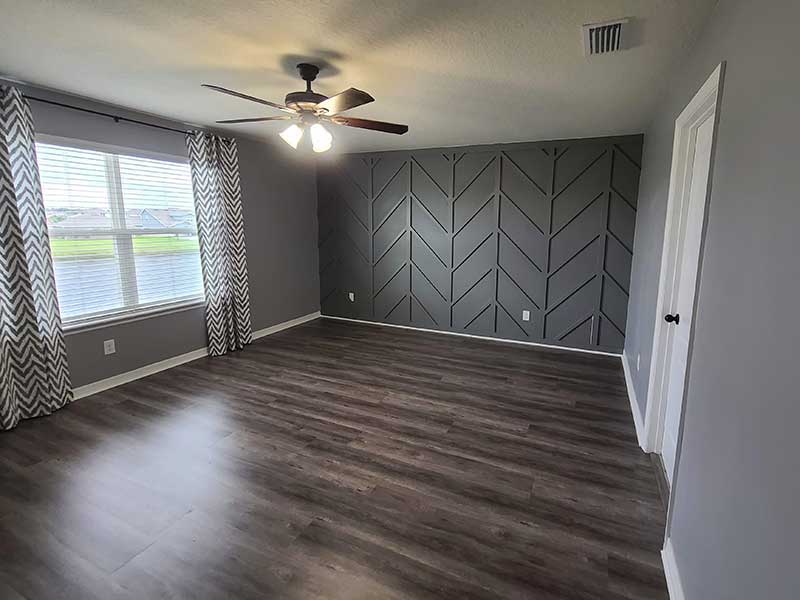
Are you planning to add a chevron wall to a room in your house? Tell us in the comments and tag us on social with #homemadebyhuseman.
Check out more of our recent DIY projects:
No post found!

Pingback: Easy Bedroom Makeover Ideas You Can Actually Do -
Wow, this looks gorgeous! I like the detailed instructions, too.
Ooo we are building our house, and I now NEED to do a wall like that!!
We built our home too so everything was pretty basic with all flat white paint. I’m no OBSESSED with feature walls we have 3 of them in our house (so far). Make sure you check out our master bedroom makeover post for more ideas. 🙂
Nice job! Takes a lot of patience. And skill 🙂
That is SO pretty! I don’t think I’d trust myself to do that. lol. Yours looks great! Well done!
Honestly, we were worried we wouldn’t get the spacing right. But once we came up with a jig to ensure even spacing and the stop block for equal cuts… SO easy.
That turned out great! I’d love to do something like that in our master bedroom. Thanks for the idea!
I like the look of this wall. Very nice instead of a headboard.
I love watching the creativity of others. This actually doesn’t look too difficult, and the result is amazing!
Wow! This is beautiful, I wish I was this handy! Lol, I’ll have to have my handyman do this!
This is incredible!!! I Dream of being able to do this one day.
Wow that is impressive! The pics and video are very helpful. I always feel like chevron walls look like so much work. But you guys provided great instructions and the wall looks great!
Looks great! Very impressive. you could hire yourself out!
I love all of these ideas! Chevron is so cute!
This looks beautiful! Great way to dress up a wall.
I love the detail, it’s subtle but fun.
Oh, that is so beautiful. I love it. Wish I was handy.
This is awesome! We bought our house last year and I’ve been putting off decorating our bedroom but this may get me started!
Love this tutorial! Such a unique and beautiful focal point!
This is beautiful! Thank you for the instructions.
What a great looking wall! I love it. Thanks for the detailed instructions.
Wow! This is so great! I love how it looks!