I have a bit of an obsession with wood feature walls. I think it’s a combination of spending a lot of time in model homes while working for a new home builder and watching far too much of the show Fixer Upper (if that’s even possible, I can’t get enough).
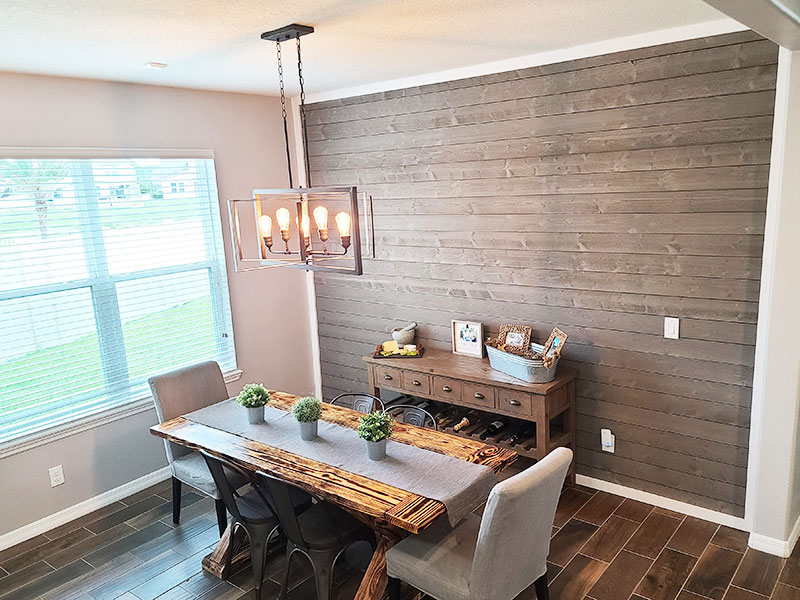
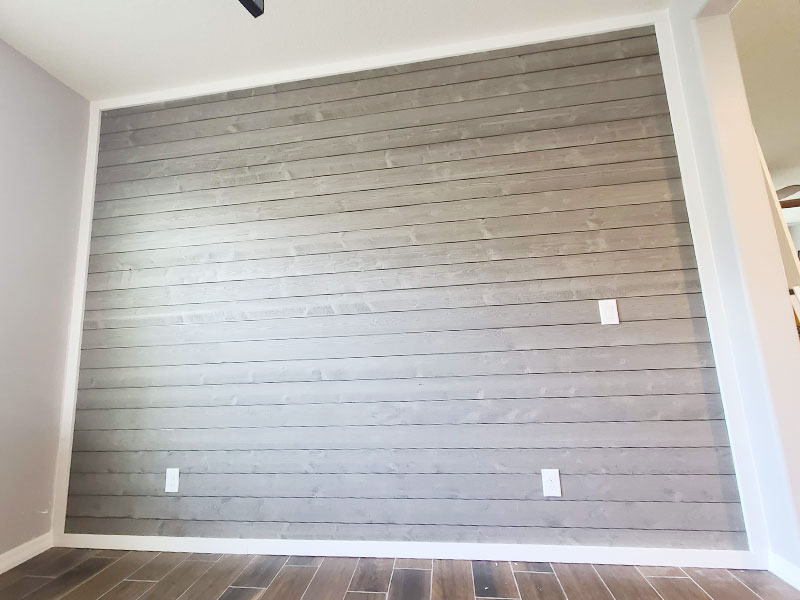
The dining room is essentially part of our entry and could be considered an extended foyer. I love a good first impression, so I’ve always wanted to put a nice WOW factor on that wall. Shiplap (thanks Joanna Gains) has always been dream for that space, but it’s always a project that get’s put on the back burner.
When we found a good deal on clearance shiplap at Home Depot, my heart beamed with joy. IT WAS TIME.
Material was bought, plans were set but we ran into one common issue with Florida construction. Our walls had subtle bows and slants that weren’t obvious with just drywall and paint, but adding a bunch of straight boards to an uneven ceiling line wasn’t the best look.
I’m not saying I’m a perfectionist, but once I know something is crooked it will drive me insane forever. This is a wall in my house I see everyday, so just letting it run slanted all the way down was not an option.
Project Time:
Approximately one full day
Materials Needed:
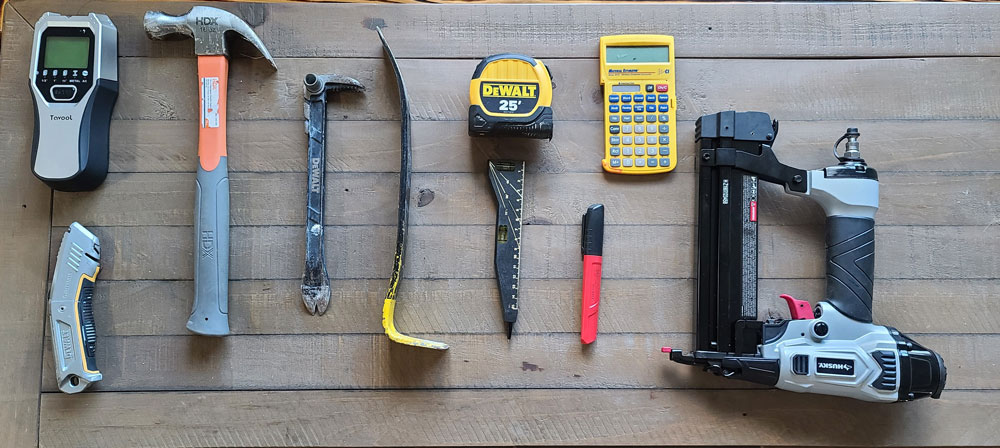
- Hammer and pry bar (to remove base molding)
- Pen or marker
- Tape measure
- Calculator (optional if you’re a math wiz)
- 1×3″ Furring Strips (optional)
- Stud Finder
- Screws, #10×2.5’’ GRK fasteners (optional)
- Shiplap boards
- Table Saw or Circular Saw
- Jig Saw or Hand Saw (if cutting around outlets)
- Miter Saw or Hand Saw
- Mallet
- Digital Level
- Nail Gun with air compressor (Or a hammer, but it will take much longer)
- Finish Nails
- Pre-primed finished 1×4 (optional for trim)
- Caulk (optional for trim)
- Cardboard/craft paper/wrapping paper (for a template if your wall is curved or arched)
Instructions:
How to prep for shiplap
We opted to remove our baseboard and did so by scoring the caulking with a razor and then prying it off with a pry bar and hammer.
This project ended up being fairly easy. Since our boards were 12 ft. long and they were going on a wall that was 11’ – 11 ½’’ in we could trim the boards slightly and go quickly through the rows.
If your boards do not fit all the way across your wall, we recommend cutting them into even lengths that will end on a stud, but start your rows varying full, and partial lengths (similar to a hardwood floor), so your seams don’t all line up on every row creating a line down your wall. Make sure these partial lengths still line up to a stud for easy install. My personal preference is the longer the better, so you don’t have more than 2 or 3 seams per row.
The wall we put our shiplap on actually didn’t have studs that ran from top to bottom because of the plumbing on other side of the all. To make it easier and ensure we always hit wood when nailing in the board, we removed the existing baseboard and installed 1×3” furring strips along the bottom and vertically at every third stud. Meaning there was one in each corner and then 2 evenly spaced in the middle.
To ensure these 1×3” furring strips stayed put and don’t bow over time, they were screwed in with a #10×2.5’’ GRK fastener and the Ridgid Brushless impact drill made for a quick and easy install.
Installing the First Shiplap Board
There’s a few different ways to install shiplap. Typically you’d start from the bottom and work your way up, but knowing the ceiling wasn’t straight I dreaded the thought of having an awkward, uneven skinny strip at the top. I knew my eyes would draw to it every time.
We started at the top with a full board, but first ran it through the table saw to remove the top lip and allow it to sit flush with the ceiling. We used a digital level to get this board as close to level as possible. It ended up being about 2 mm out of level, but thankfully that’s not quite enough to be visible to the naked eye on just one board and we could make adjustments to ensure this slight tilt didn’t work it’s way all the way down.
To attach the board to the furring strips, we used a finish nail gun with 18 gauge finish nails and the air compressor set to have an output pressure of 70 psi. These small finish nails weren’t even visible in the gray textured wood, so it was a perfect finish without needing touchups.
Installing the Remaining Shiplap Boards
The beauty of prefinished, store-bought shiplap is it’s natural gap between each board. It’s really a saving grace when working with walls that aren’t straight. Since that first board was about 2mm out of level, we made 1mm adjustments in the next two boards with some gentle taps using a mallet to get it to sit in just the right spot.
Before we nailed into each strip we made sure the boards were lined up correctly without the gap spacing being to drastically different to achieve a clean straight look, despite the uneven walls working against us.
We put 3-4 nails on the ends of each board and 2 on the interior parts of the board at each furring strip.
Once the boards were even and level, working your way down is really quite fast and easy. The tongue and groove of store bought shiplap naturally creates the perfect gap and if you’re working with a nail gun, a couple nails in each board holds it in place and you move on to the next one.
We checked to make sure the boards were still level every 2-3 boards incase there were variations in the wood and made minor adjustments when necessary.
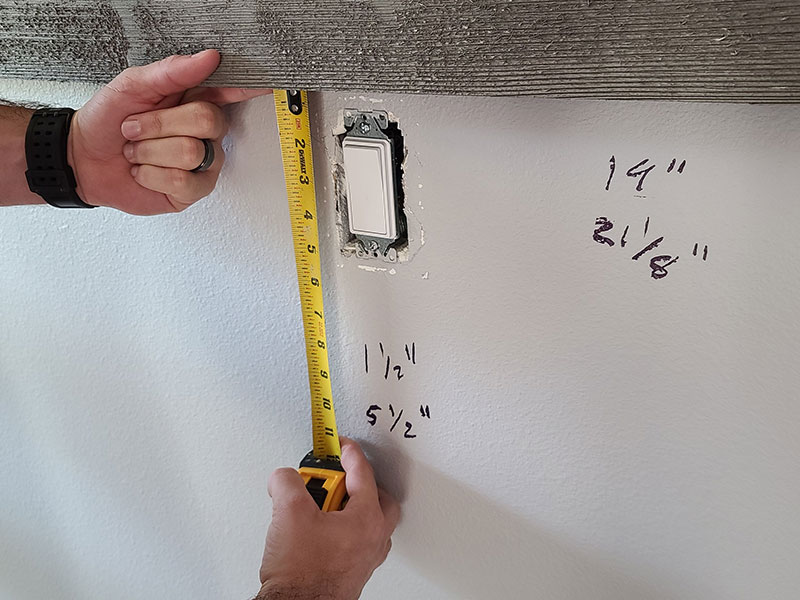
Installing Shiplap around Light Switches and Outlets
While installing shiplap is mostly easy, working around a light switch or an outlet can slow down your pace. However, it’s actually pretty simple to work around with the help of a jig saw.
Safety First: Ensure the breaker for the room you’re working with is OFF and then use a voltage meter to ensure there’s no electric current in the switcher or outlets.
We recommend removing the plates and getting a box extender so the face of your switch or outlet sits flush with the shiplap.
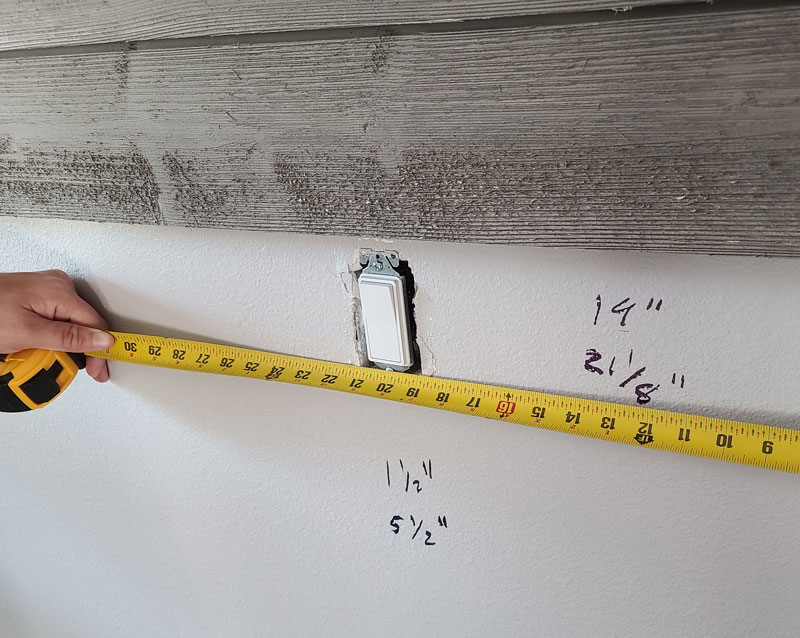
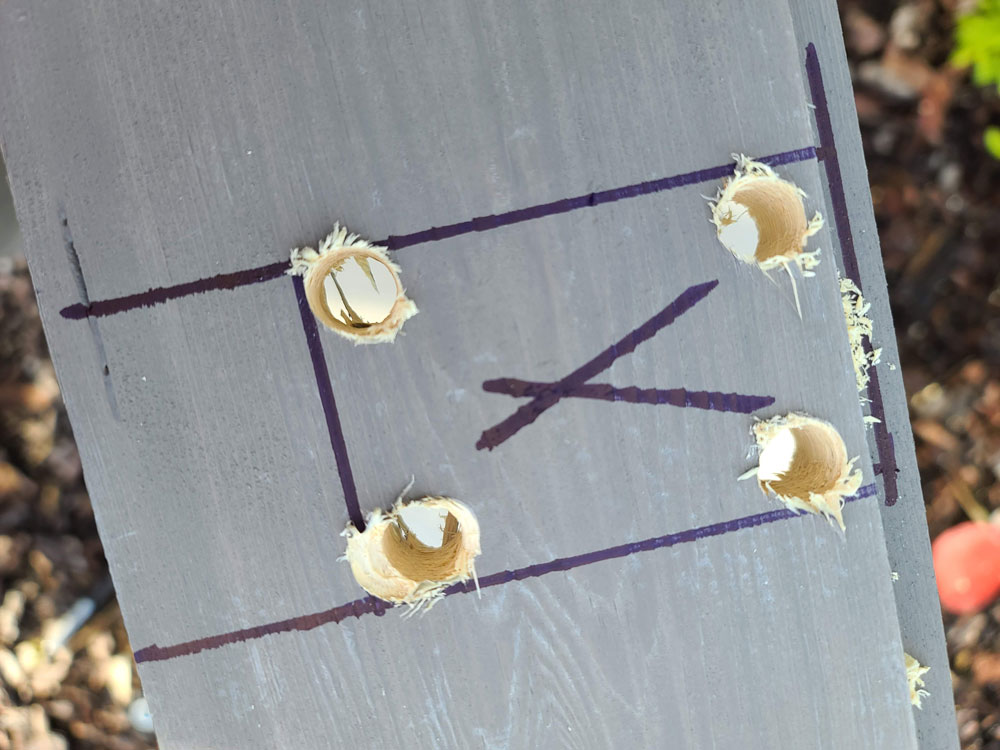
To cut a gap in the shiplap, ensure your board (or two if the outlet will cross two boards) is already cut to the length it needs to be to fit on the wall. Then measure the distance from where your board will start to the side of the box. Then measure over 2 more inches for the overall width of the box. Transfer those measurements to the back of your shiplap and draw two vertical lines at those measurements.
Then measure the distance from the top of the bottom lip of the board above the outlet, to the top of the outlet or light switch. Then measure down 3.5’’ for the overall height of the outlet box. Transfer this measurement to the back of your board(s) measuring from the top and draw a horizontal line between the two lines. The space above that line you will NOT cut. You can mark an “X” where you need to make the cut out.
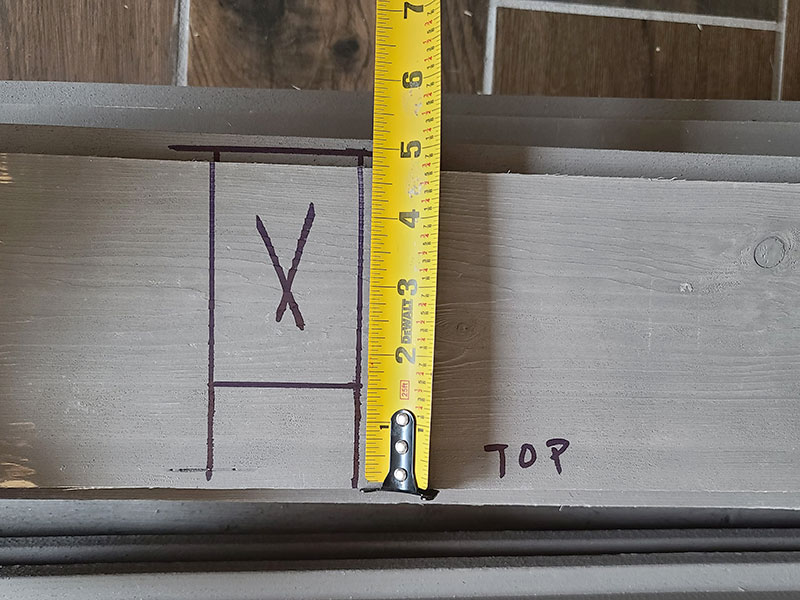
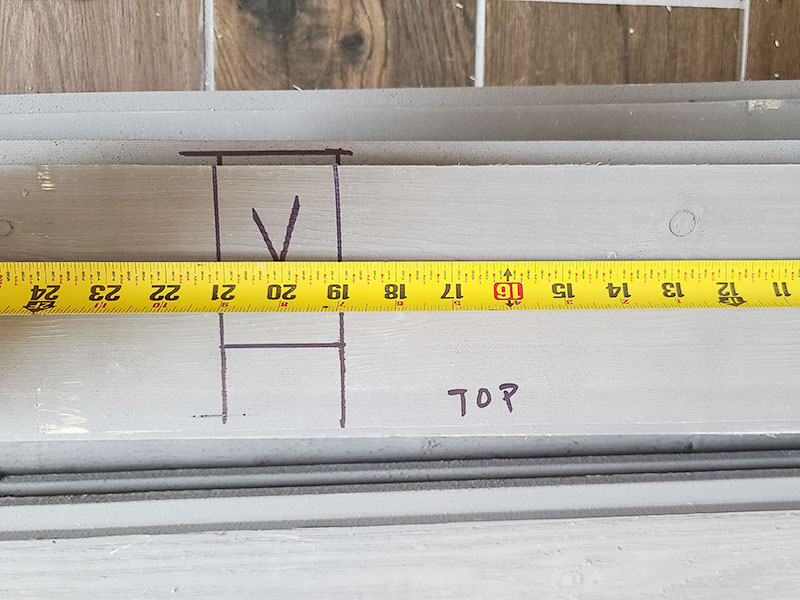
You should now have a rectangle the size of your outlet or switch gap. If your switch or outlet falls between two boards, you may have to do this twice, but skip the step for the top or bottom measurements.
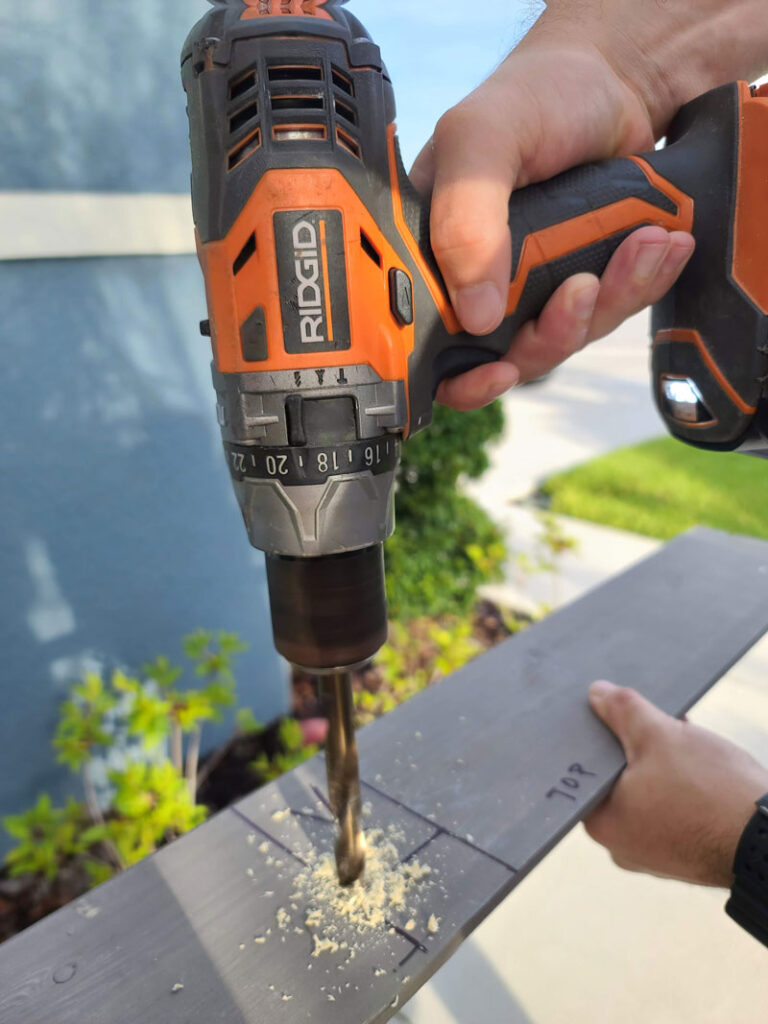
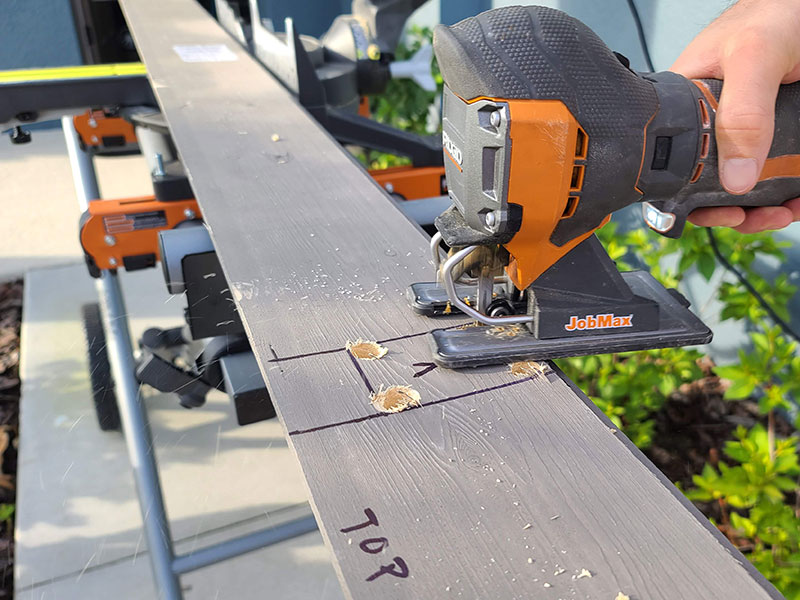
To cut out this gap we recommend using a jigsaw. We use the Ridgid Job Max with Jigsaw head attachment. You could also cut this with a small handsaw, it’s just going to take a bit more work. We like to work smarter, not harder. You can use a large drill bit just inside the corners of the rectangle to give you a starting point for your saw.
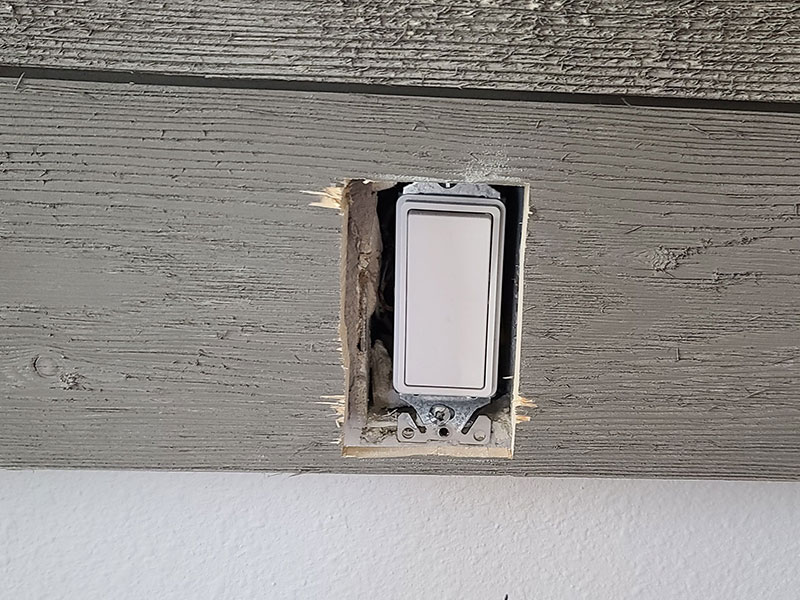
Work your way around to create a rectangular hole in your board. If you measured correctly, when you install your board you should have a hole perfectly positioned for your switch or outlet. Don’t stress it if your edges are a little rough, the face plate will go over them. This is why we recommend the box extender, so the plate sits flush over the wood rather than concaving your switch into the wood.
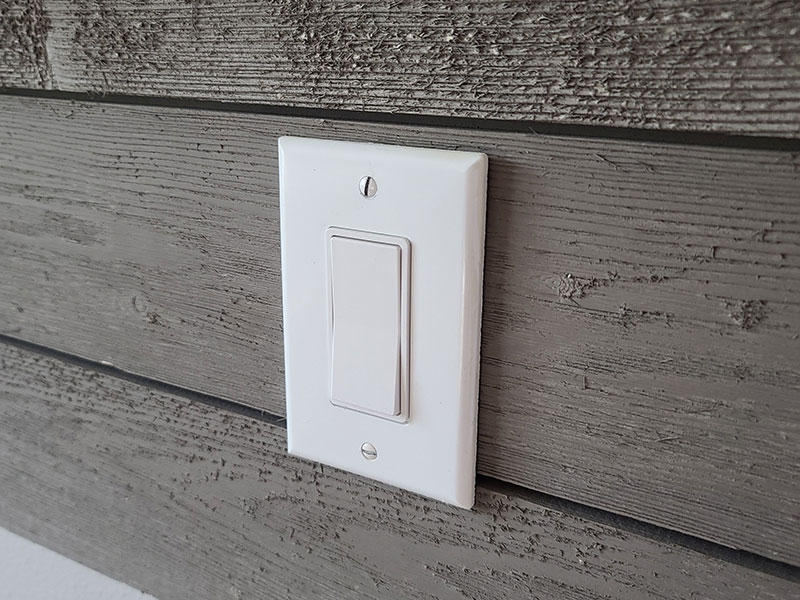
Pull the switch or plug through, install the shiplap board, then install the box extender. Once you’ve completed the section around the switch or plug you can attach the faceplate.
Finishing the Shiplap
When we got to our last row, it was the inevitable half-inch sliver. To finish it, we ran the final board through the table saw. To cut it to the width for a clean finish.
While the wall looked phenomenal, I felt it needed a white trim as an accent to help it pop. We used pre-painted white 1×3 all the way around and then used white caulk where the trim met the wall for an extra clean finish.
Caulking around the trim helped tremendously with a clean finish where the walls weren’t perfectly straight.
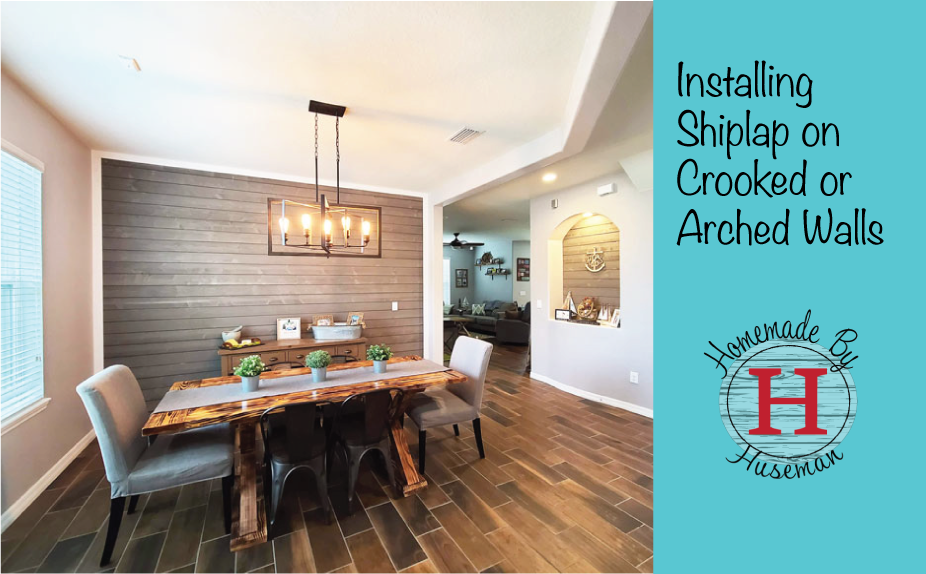
Shiplap in an Arch
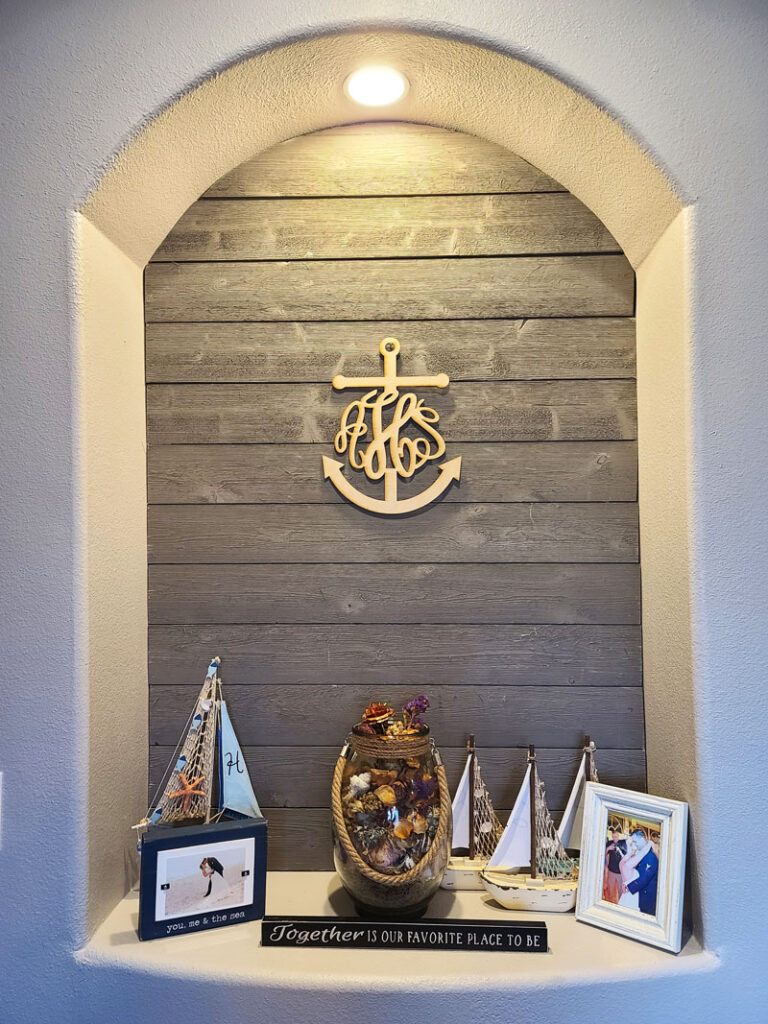
In our dining room we have an arched niche. As we discussed putting shiplap in the dining room my eye just kept drawing to the niche. What a beautiful accent it would make!
As if lining up shiplap on an uneven wall wasn’t enough fun, why not put it on a curved wall! Better yet, on a curved wall that also isn’t even or symmetrical.
Don’t worry it’s possible! The trick is to create a template.
For the niche we started the shiplap as normal for the straight part. We measured the length, cut the boards to size, started from the bottom and nailed the boards in place at the studs.
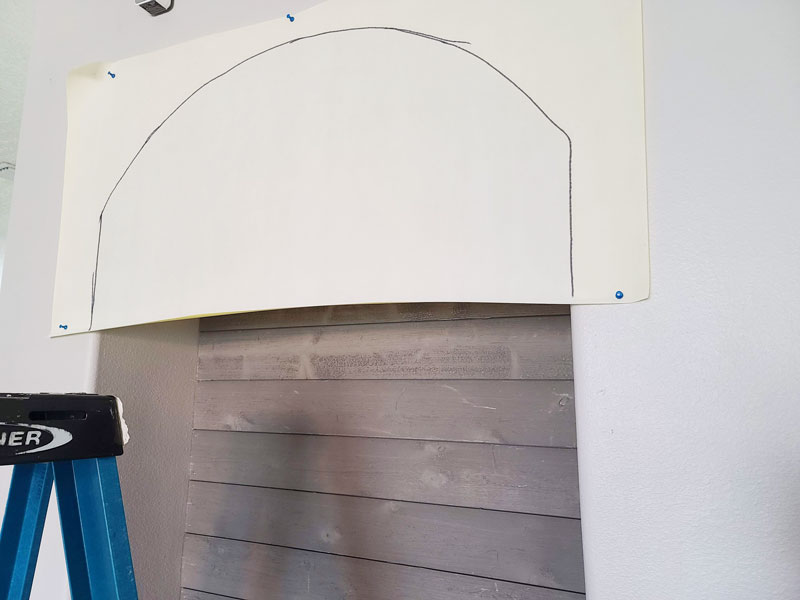
For the part that curved, we created a template. You can do this with cardboard, craft paper, or even wrapping paper. It just needs to be large enough to cover the space you’re trying to fill. We used craft paper since it’s what we had on hand.
To start, we pinned the paper outside of the niche and traced that arch. Then we cut the paper to the arch shape and put it in the arch to make sure the inside wall that the shiplap was going on would match the arch. I highly recommend this, as ours was off by just a little bit (did I mention none of our walls are straight?). To adjust I just retraced and trimmed where necessary.
Once we had a template we layered the boards with the tongue and grove in place on the floor with the front face of the boards on the floor and the part you’d put against the wall facing up. Then we laid the paper template on the boards and traced around the template to create cut lines for the shiplap.
A jigsaw is the easiest way to make these cuts, but in a pinch you could carefully use a handsaw, but it will take some work. When in doubt, go a little larger than your template and you can trim it down if you need to.
Once you make the cuts, your boards should fit in place like a puzzle piece.
Working with shiplap is fairly easy if your walls are perfect, but if you run into some imperfect walls, arched walls or a wall outlet, we hope these tips help you create the perfect accent wall in your home.