
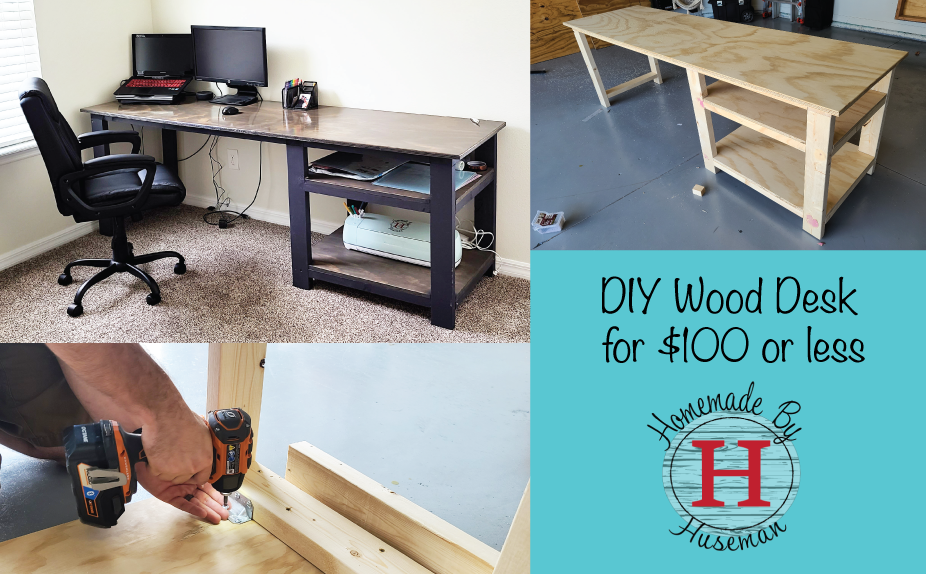
The time is COVID-19 pandemic. I was already working from home in our home office, but Steven found out he’d soon be working from home too. We’ve never dealt with needing an additional home office before! What’s a DIY-er to do? Build an easy DIY wood desk!
Thankfully we had the space, but buying a desk for a couple hundred dollars for a temporary situation just didn’t feel rational. We thought about using a folding table, but it was too small and just not built to support all the computer gear he needed.
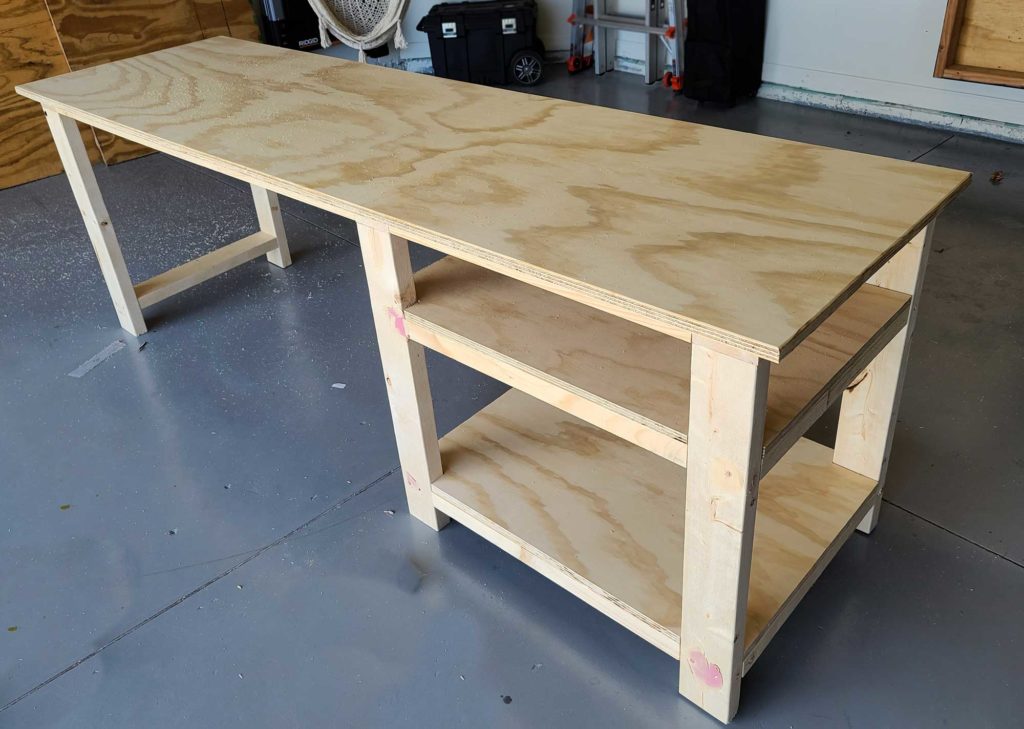
Steven got to work drawing up plans in an effort to make a desk that felt useable, but without spending a small fortune on it. The goal was to only need some 2x4s and plywood, but not look like work bench. The plan was to keep the desk as a craft space for all of my Cricut projects when the need to work from home was over.
Here’s what you’ll need to build an easy DIY wood desk for about $100 or less.
Material List:
- 3 – 2x4x10’ SPF (Whitewood)
- 1 – 2x4x8’ SPF (Whitewood)
- 2 – 2x2x8’ SPF (Whitewood)
- 1 – 4’x8’ ¾’’ Sheet of Sandee Plywood (Cabinet Grade)
- 8 – Simpson Strong Tie GA2 Brackets
- 1 – TEKS #8 x 1/2 in. Phillips Lath Screws
- 1 – GRK Fasteners #9×2’’ Screws
Tools Used:
- Saw
- Circular Saw or Table Saw
- Circular Saw or Miter Saw
- Router
- ¼’’ Roundover Bit (for finished edges)
- Drill/Driver
- Phillps Head Head
- Torx drive bit (T25)
- Impact Driver or Drill/Driver
- Sander
- Speed square
- Tape Measure
- Pen, Pencil or Marker
- Jigsaw
Our Preferred Product Brands Used:
- Simpson Strong Tie (Angle Brackets)
- GRK Fasteners
- RIDGID Power tools
- RYOBI Power tools
- Behr Paint and Primer (HD)
Estimated time for completion: 8+ Hours
Step by Step Instructions:
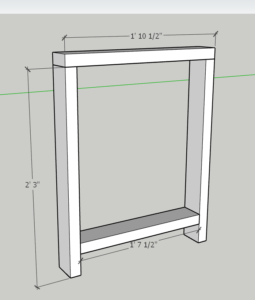
1. Cut & Assemble Wood Desk Legs
Cut the 2×4’s into the following lengths:
- 6 at 27’’ lengths
- 3 at 22.5’’ lengths
- 3 at 19.5’’ lengths

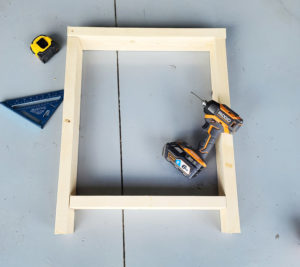
Assemble the legs by attaching the two 27’’ vertical legs to the 22.5’’ top plate using 2 screws into each leg.
Now attach the 19.5’’ bottom support to the bottom half, leaving about a 3’’ gap from the bottom of the legs to the bottom of the support using two 3’’ long screws on each face into the support.
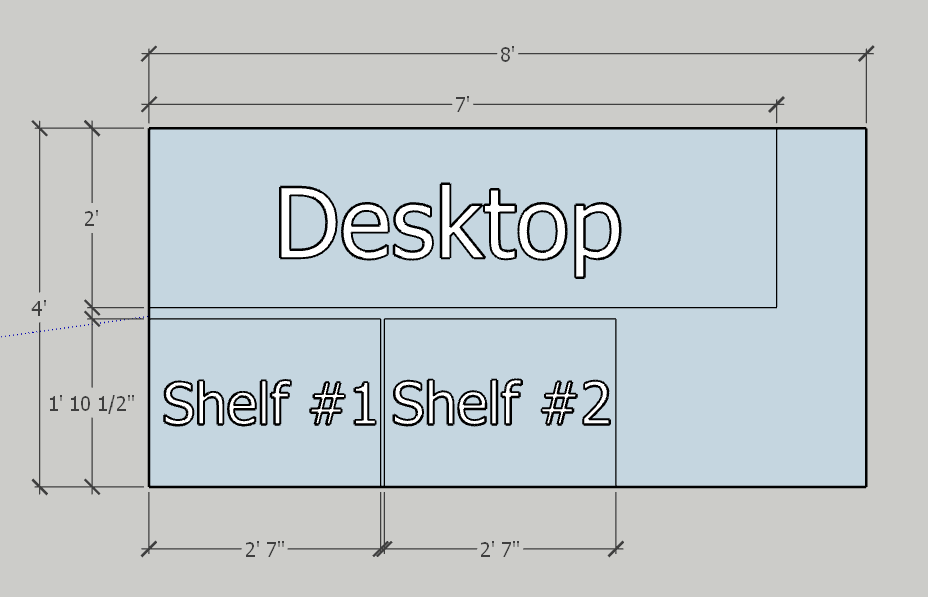
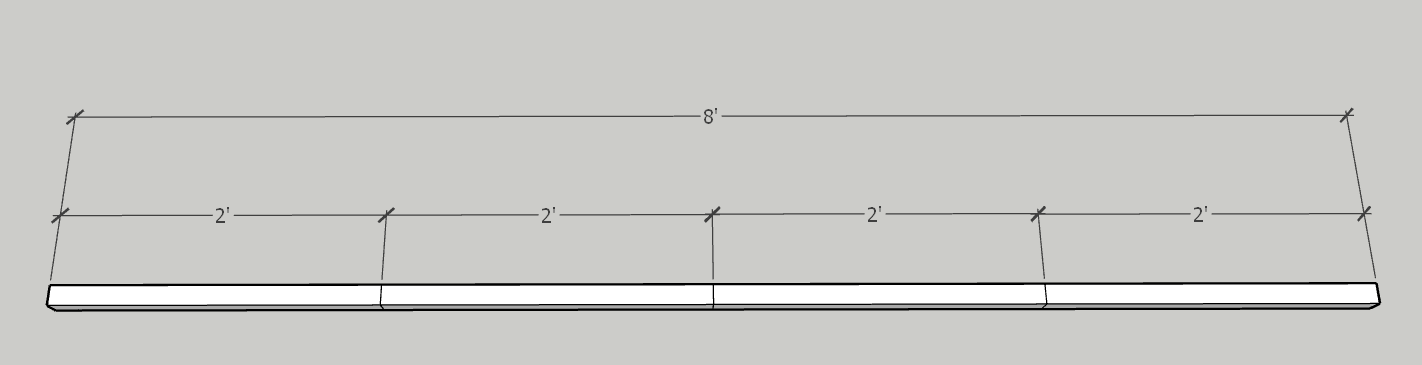
2. Cut the Desktop & Shelves
Measure the desktop on your sheet of plywood to the final desk dimensions. In this case we made the desk 24’’ x 84’’ . Your local home improvement may be able to cut the plywood for you and get the measurements close.
We find it easiest to use a table saw for clean straight cuts. You could also use a circular saw with a straight edge tool as a guide.
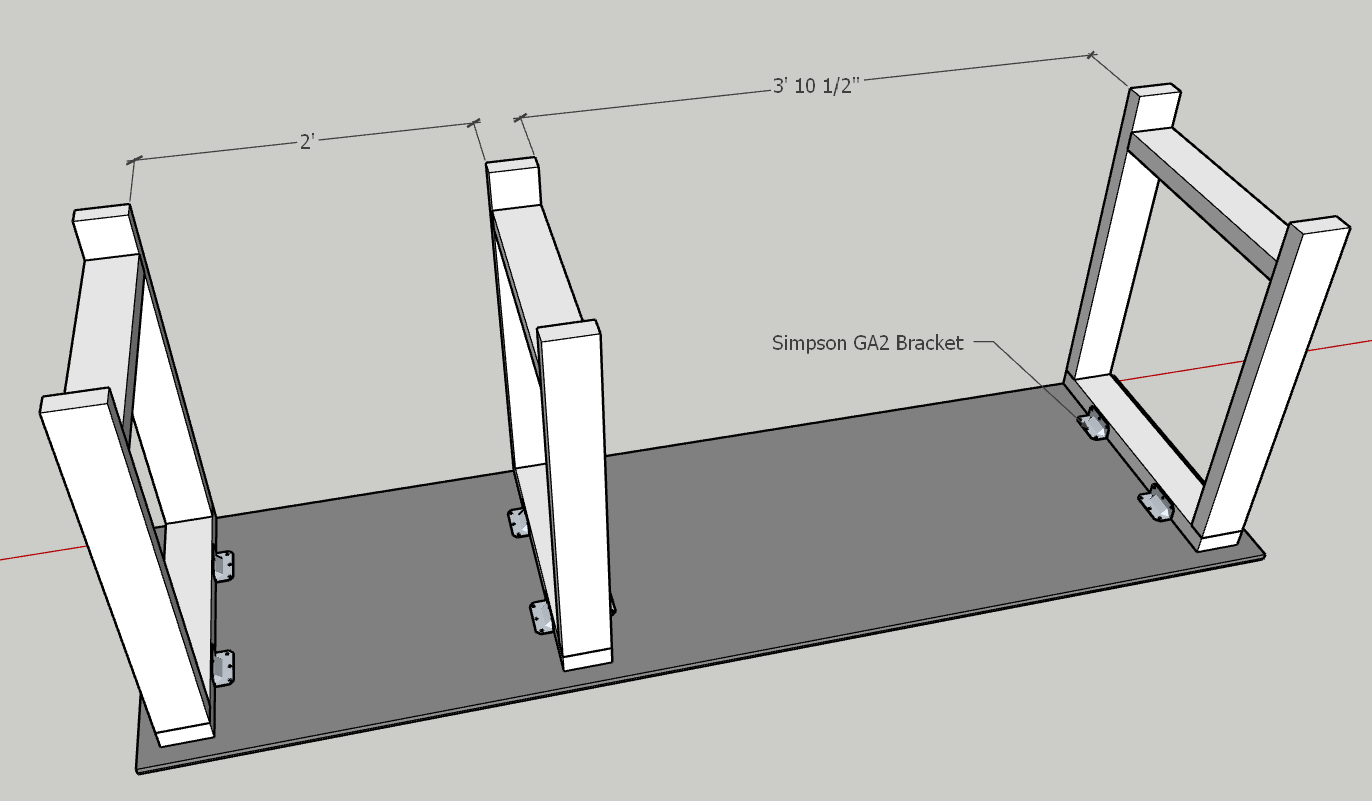
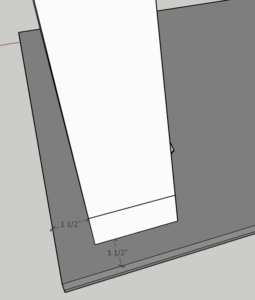
3. Attach the desk legs to the BOTTOM of the desktop:
Measure and space out the 3 assembled legs. Space the legs 1-½’’ from the 3 of the edges. The legs should be flush to the edge of the back edge of the desktop.
Attach the legs using Simpson GA2 Brackets using #8 x 1 in. Lath Screws and 2’’ Long screws from the top plate to the bottom of the desk being careful not to overdrive the screws.
A 2’’ screw is a perfect length without breaking through the top of the desk
4. Create & install the back brace
Measure and cut the 2x4x8’ into lengths to create the back brace. These measurements should match the spacing of the legs
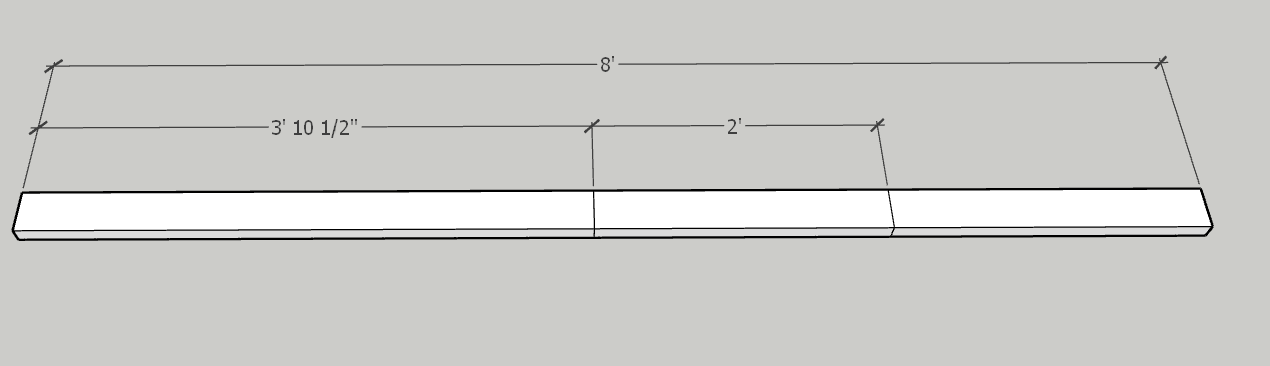
To install the the back brace do “toe” screw (drilling in at an angle) into the legs

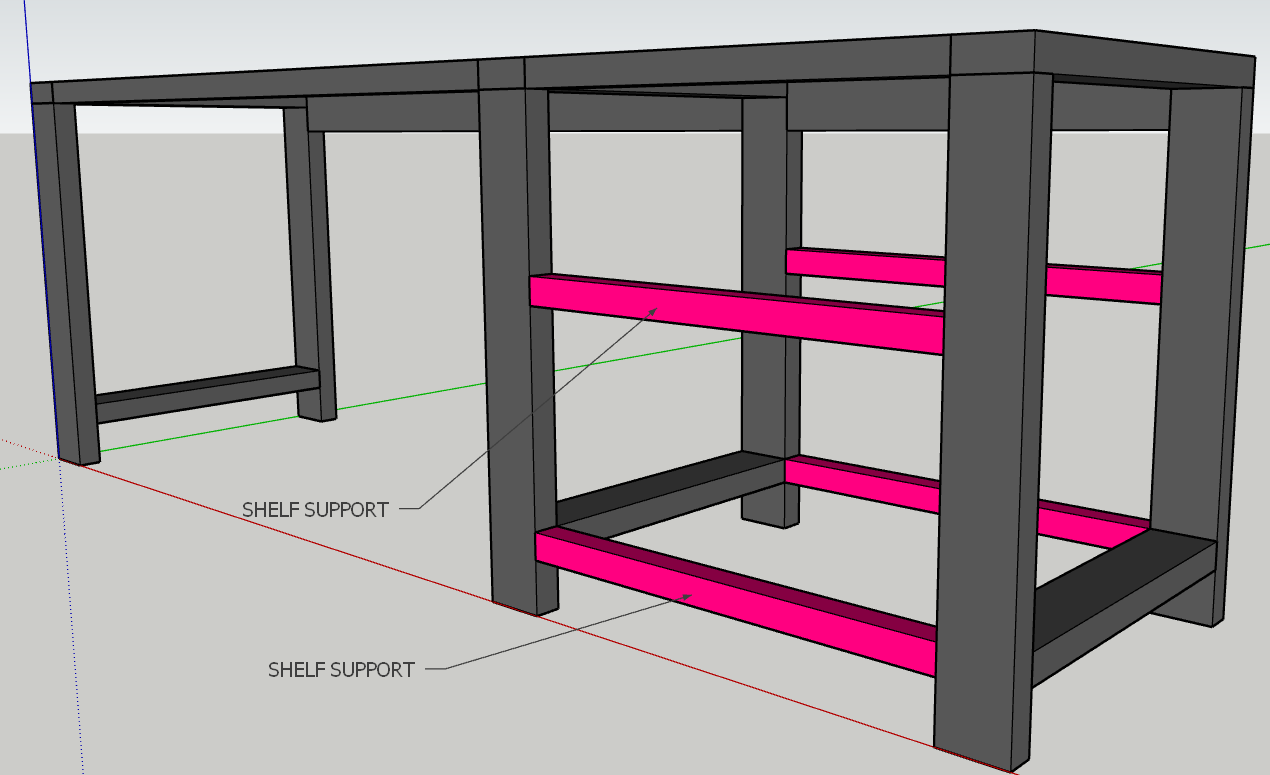
5. Cut & Install Shelf Supports
Using the 2x2x8, cut 2′ sections to create supports for the shelves.
I over drilled 3-⅛’’ GRK fasteners through the 1.5’’ face of the 2×4 to attach the 2×2 to the legs. An impact driver made quick work of this. Doing a toe-screw may cause the wood to split because the material is so small. Using a kreg jig would also be an option if you have one.
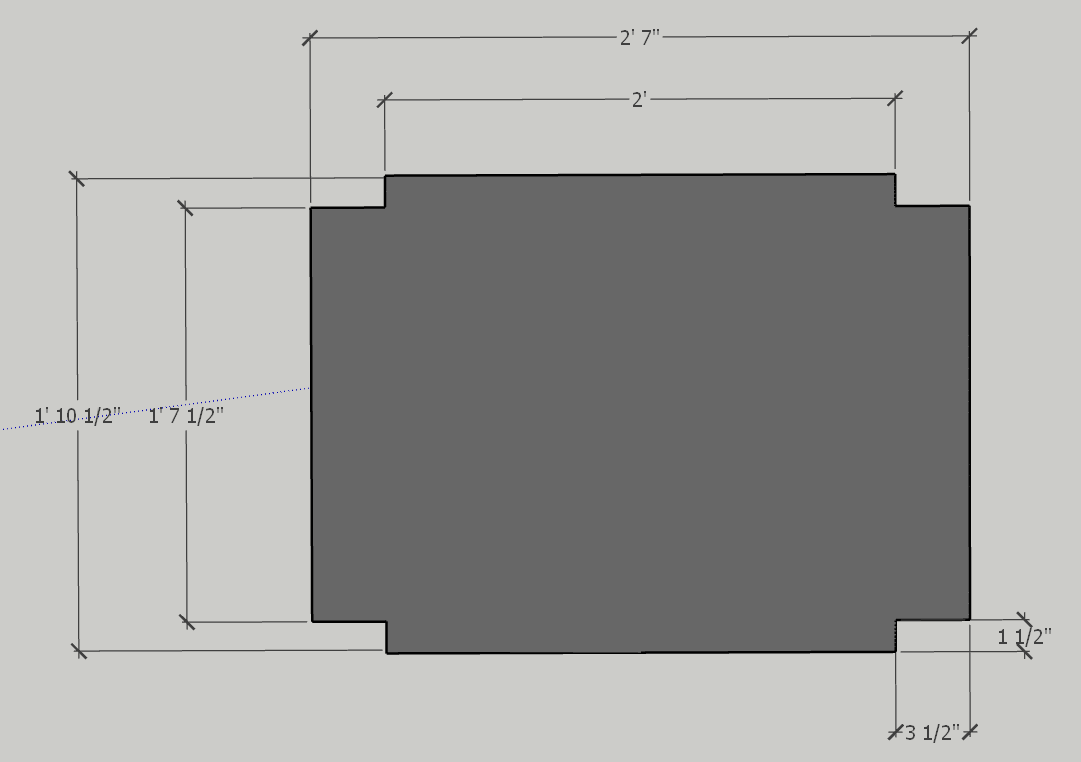
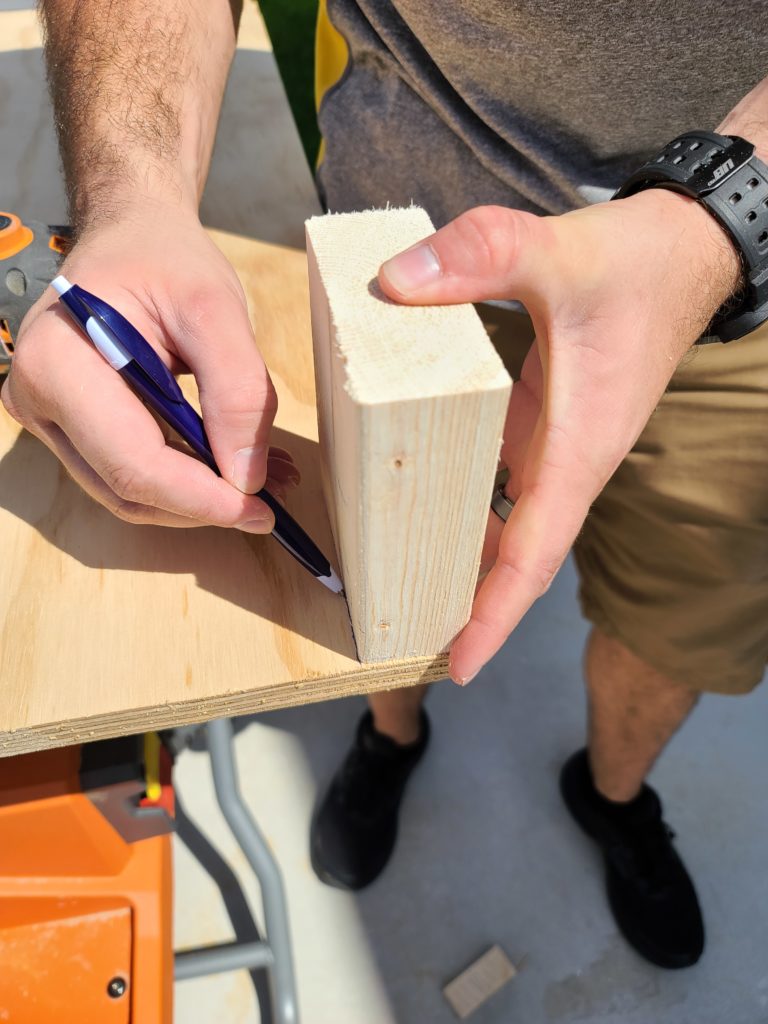
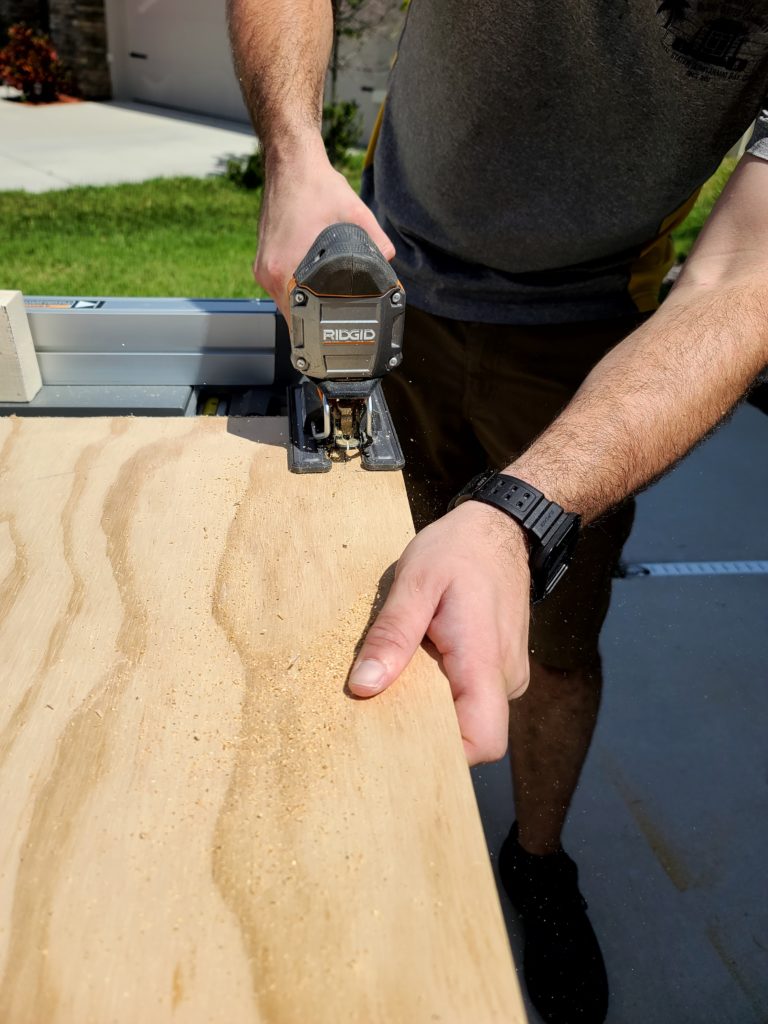
6. Cut & Install the wood shelves
After having the overall shelf measurements cut, use a jigsaw (a hand saw can also be used) cut a total of (4) 3.5’’ x 1.5’’ notches for the shelf to slide around the 2×4 legs. Install shelves similar to the desktop (no need for brackets) just the 2’’ screws from the bottom to the brace into the shelf

After installing your shelf units, you can flip the desk up to start sanding and finish the desk the way you want. We used a ¼’’ rounding radius bit on all the plywood edges for a smooth finish. If you’re planning to paint we also recommend a wood filler to patch nail and screw holes as well as any wood imperfections that you don’t like.
Tell us your thoughts on this easy DIY wood desk and then check out our easy paint and stain finish »