I love to use my Cricut and my favorite thing to make with it is onesies! It was a no brainer to create a baby shower onesie station for the baby shower I was hosting. They’re so quick and easy and make a perfect personal addition to a baby shower gift.
My friend and I were co-hosting a baby shower and I was so excited to create a unique baby shower onesie station that also added something fun and useful for the new momma to take home with her after the baby shower. Plus, even if everything didn’t get used, mom could take the left overs and finish off the onesies and bibs with an iron.
The Prep Work for a Onesie Station
The first thing I did was buy a bunch of blank onesies and some bibs too. I made sure to choose a cloth style bib because I was worried anything with a plastic backing might melt in the heat press.
The onesies were found at Target and I bought a 0-3 set and a 6-9 set, so mom would have a variety of sizes with cute designs. I also found the bib’s at Target which I thought was a steal because I could get 10 bib’s for less than $10.
To save a little on HTV vinyl and still get a variety of colors, I looked for an “off-brand” on Amazon and was thrilled to find a multipack for $25 from HTVRONT that was way more than I needed, but I can never have too much HTV. It worked beautifully and so far it’s held up well in the wash on other projects I’ve done.
Creating Vinyl Desings
Now that I had all of my materials, it was time to get designing! Since I knew I wanted at least 25 designs I didn’t want to create them all as individual projects on Design Space. So I created a bunch of different sayings and extra design pieces all in one project and made my pieces different colors to cut on different colored vinyl for variety. You could certainly do this with all one color vinyal, but I liked the idea of guests being able to mix up the different colors.
It’s important to stay mindful of size while designing, I would recommend keeping all of your pieces smaller than 3×4. I also tried to make as many mix and match pieces and phrases as possible. Things like a few of the baby’s name, initial, “Mommy’s” and “Daddy’s” and then also things like “Cutie” “Just Like” and fun phrases like “Hugs $5.00”, “Feed Me”, “Hello World,” and “Can’t Touch This”.
Plus to make it more fun for the baby shower guests, I also cut designs like arrows, decorative circles, hearts, and bow ties so they use their own creativity to personalize a onesie or bib for the new baby.
If you know there will be lots of family at the baby shower it would also be cute to create some that say “Auntie,” “Grandma” or “cousin” so family members can make onesies special to them. What grandma doesn’t love it when their grandbaby wears a onesie that says “Grandma’s Little Cutie”
Cutting the Onesie Designs for Easy Use
When it came time to cut with the Cricut I tried to attach and place everything so it maximized the vinyl sheet, but also still gave me plenty of space to cut it all out. Since it was all in one project document, I was able to connect the Cricut and let one sheet cut right after another.
Quick Tip: To make it easier to weed small fonts or designs, put a circle or rectangle around your design and attach it so they stay together. This will cut back on the excess vinyl you have around your design as you’re trying to weed it.
I weeded each design in advance so the guests could see them and pick them. I also cut the carrier sheet pretty close to the remaining HTV to minimize any overlapping issues if someone used two designs. To save a little time, I started weeding while the next sheet was cutting with the Cricut.

The Set Up of a Onesie Station for a Baby Shower
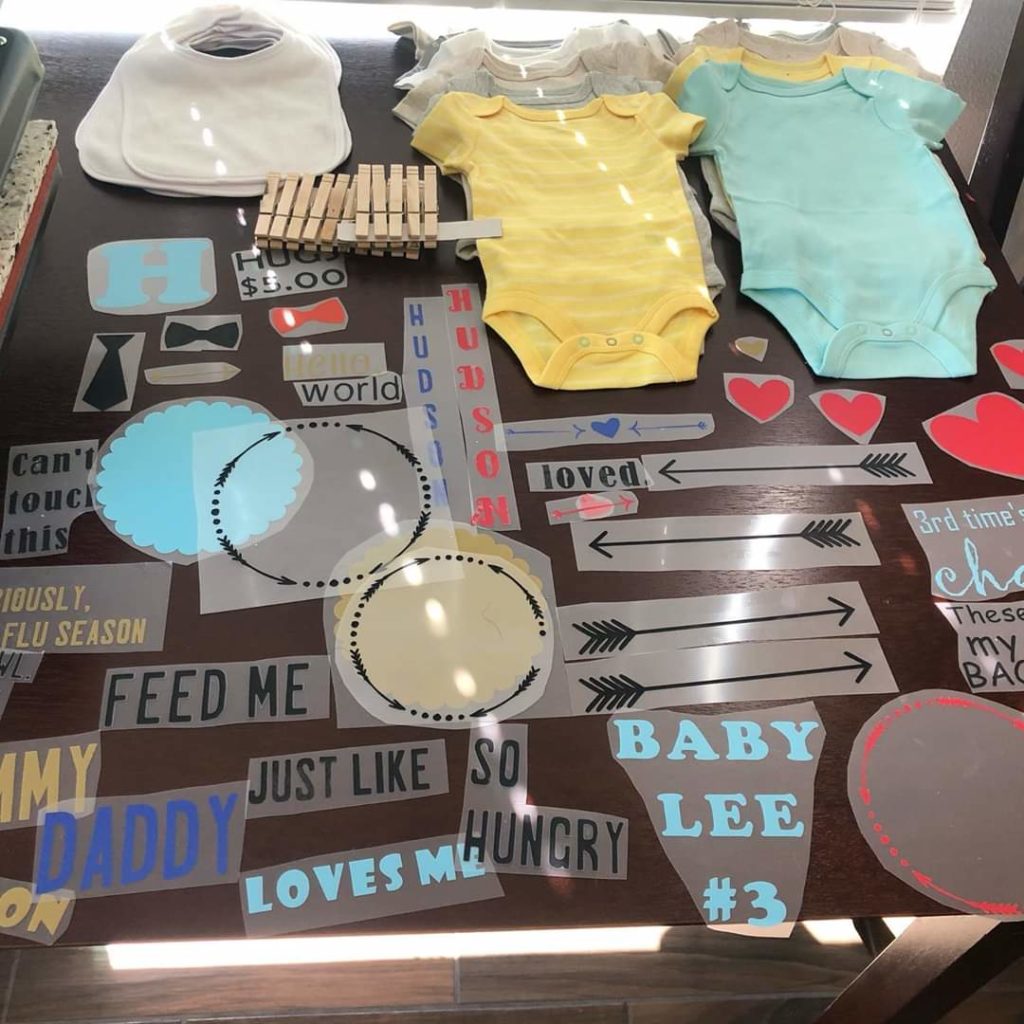
On the big day to set up the onesie station for the baby shower, I placed the blank onesies and bibs, all of the cut HTV face up so they could see the options, my heat press (you could use an Easy Press if that’s what you have), and clothes pins on a clean table (important to be free of dust and debris so they don’t stick to the HTV cut outs). I put the table in front of a window with blinds so gusts could clip their finished designs to the blinds to show off, but you could also do this by hanging a couple of string lines.
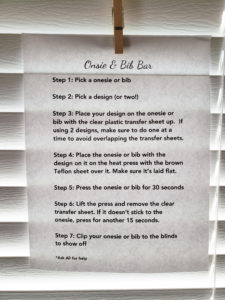
Instructions for a Onesie Station at a Baby Shower
I also pinned up instructions, to guide the guests on how to do it in case I wasn’t near by. Having a trash bin near by as well is highly recommended, so guests had a place to put the HTV carrier sheets when they’re done.
Over all, making a onesie station for a baby shower with my Cricut designs was a hit! I had an idea of how I thought the pieces would be used, but the shower guests used their own creativity and created combos I’d never thought of. This was a co-ed shower and much to my surprise this was enjoyed a lot by the guys at the baby shower. New dad seemed to love it just as much as new mom did.